Microsoft’s operating system offers the ability to create user accounts so that each person who uses the same computer has their own account to manage their files and applications with the necessary permissions. When we turn on the computer and start the operating system, we will see the Windows 10 login screen. In this screen, we can see how the list of the active user accounts in the system appears in the lower left corner.
Just by choosing your account from that list and entering the password, you will login to Windows 10. However, there are some tasks or functions that will only be available to the computer’s administrator user, such as being able to manage these user accounts. The system administrator will be the one that can create, delete, activate or deactivate a user account in Windows 10.
Steps to disable or enable a user account in Windows 10
Well, if you are an admin user and want to know how to disable or enable a user account in Windows 10, then just follow the steps below. The first thing you have to do is open the menu that appears when you press Win + X or right-click on the Windows 10 Start menu.
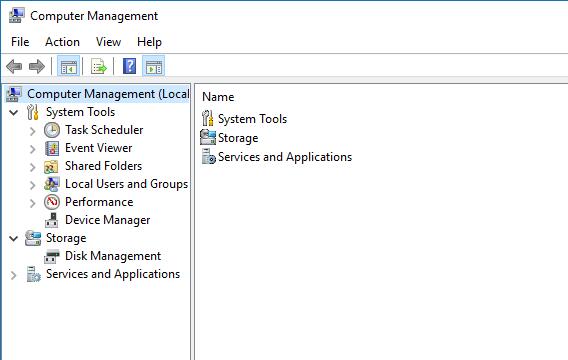
Between the options, look for Computer Management and click on it. This will open a new window where the administrator user will be able to access the computer management, system tools, task scheduler, event viewer, shared folders, performance, device and disk management, services, applications, and local users and groups.
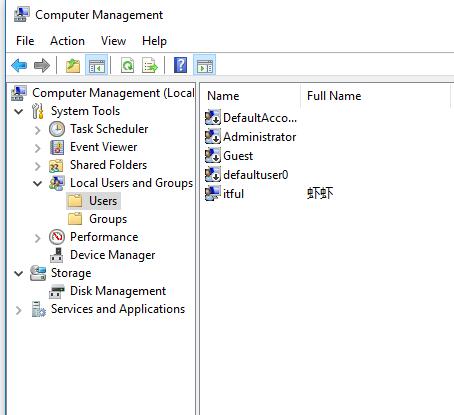
That last option is the one we’re looking for and it can be found inside the System Tools section. Expand the option Local Users and Groups and then click Users. Automatically, you will see in the right panel of the window a list of all the user accounts of the system and the available account types.
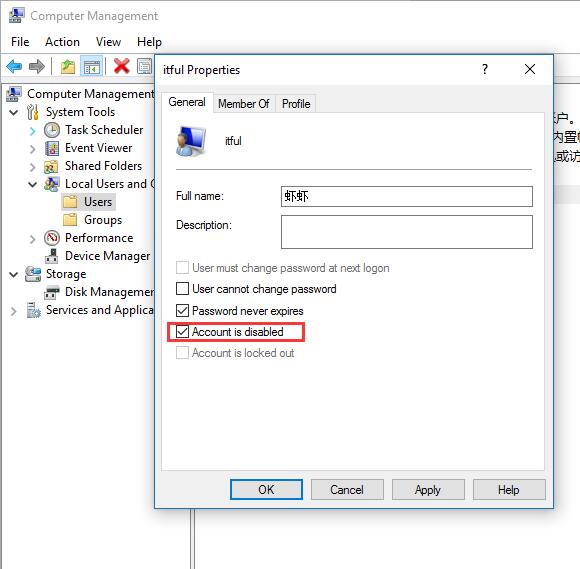
From that same list, we can select the user to which we want to disable or enable. To do this, just double click on the user to open the account’s properties, check the box Account is disabled. In case we want to enable it, simply repeat this same process and uncheck the box. As you can see, in the same window you can indicate if you want the user to be unable to change its password, make the password never expire, force the user to change it at the next login, etc.
Read More:
Best Antivirus for Windows
The way to make Windows 10 Automatically Connect to a VPN when starts
What is Windows virtual memory and Recommended virtual memory
How to allow multiple RDP sessions in Windows 10 without modifying system files