Although perhaps the most usual is to use Window with a single user account, it is often necessary to have multiple accounts, especially on shared computers. This makes things a lot easier when we share the computer with our siblings, roommates or if underage users have access to the PC and we want to control their access.
For this, Microsoft’s operating system offers the possibility to create different users accounts, to manage, eliminate, or to give them certain privileges. That is why, we are going to share below a small guide on user accounts in Windows 10, how to create a new account, enable a guest account, change to administrator account, delete accounts, etc.
Create a new user account and rename accounts
If you want to create a new user account, then the first thing you have to do is go to the Windows 10 Settings page from the Start menu and select Accounts. Once you do this, enter the Family & other people section and you will see in the right panel the options of adding a relative or another person. If you want to create an account for anyone then choose the second option, then enter their email account, click next and it’s done. If you do not have access data for that person, then you can click on this option and indicate the email and password that you want to use to log in to the system.
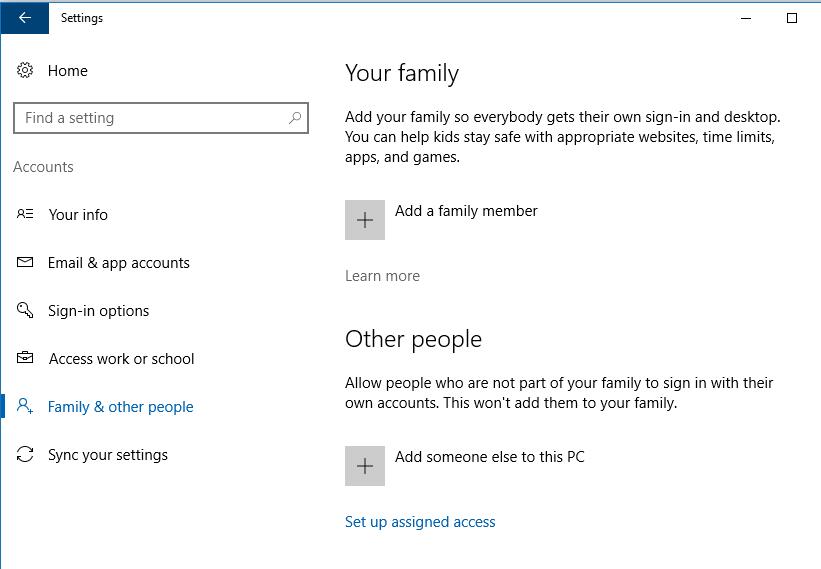
If on the contrary you want to create a family account, then select the add family option. This makes it possible for all family members to set up their own login and desktop or to make children not have access to certain websites, applications, games or even set time limits for using the PC.
On this occasion, when adding a relative, the first thing that the system will ask you is whether it is an adult or a minor and in any case you must indicate the email address for their account. Unlike the option to add another person, Windows 10 requires that the family account has a Microsoft account, so if this is not the case, you must create it beforehand.
If once you have created a user account you want to change its name, from Settings > Accounts > Your info you must select the option Manage my Microsoft account, which will take you to the website of your Microsoft account and from where you can edit your name.
Delete accounts or change account type
Once you have created different user accounts in Windows 10, if at any point you want to change the type of account from standard user to admin user, then you must access the system settings again and within the Accounts > Family & other people section you will find below each option a list with the created accounts.
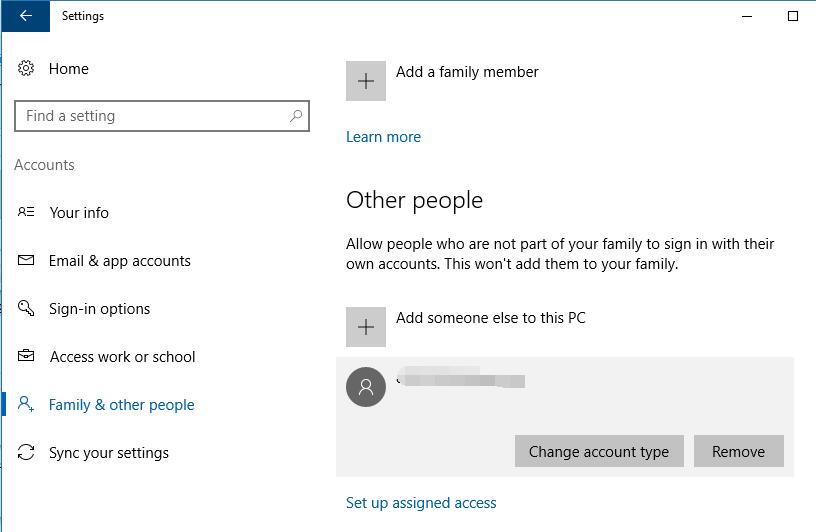
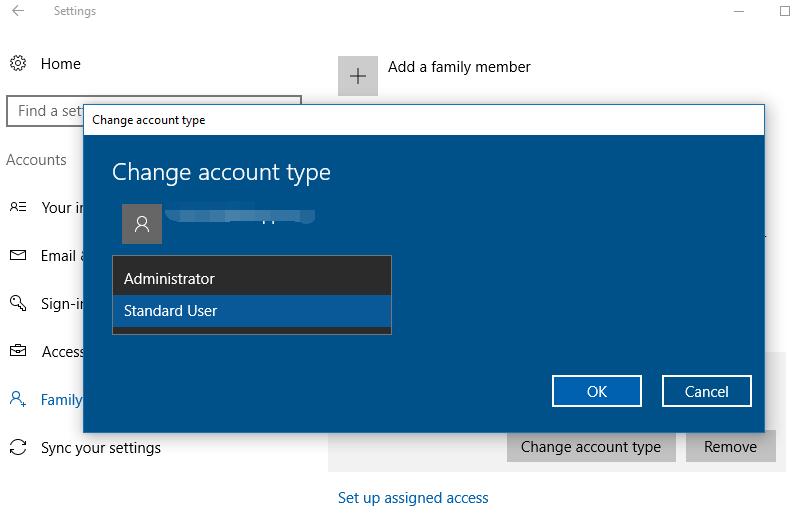
By selecting one of them, you will see two buttons are automatically displayed, one to change account type and another to remove it. If you click on the first one, you will see a new window where you can indicate the type of account that you want to assign, standard or administrator, click OK and the changes will be effective.
In case you want to delete it, then you must follow the same steps as before, but instead of clicking on the button Change account type, you have to choose the Remove option. Before deletion occurs, you must confirm that you want to perform this action. Windows will warn you that deleting the account will cause user data to be lost on the computer, including desktop items, downloads, documents, photos, music, and other files. So, if you do not want to lose them, you must back them up beforehand.
Changing the account type and deleting an account can also be done from user accounts in the Windows 10 control panel.
Enable or disable guest accounts
Windows offers the ability to enable guest accounts, ideal for users who do not have a permanent account in the computer but which we want to give access to use it. However, to avoid problems, the guest users will not have access to our personal files, they will not be able to install applications or change the system configuration.
The fastest way to enable the guest account in Windows 10 is by running a single command from the command prompt. To do this, open a command prompt with administrator permissions, type net user guest /active:yes and press Enter. If all went well, you’ll see a message saying that the command was executed correctly.
At that moment, you can check if the guest account is visible on your computer by displaying the start menu and clicking on the top where the name of the current user appears.
If at some point we decide to disable the guest account, for this we must execute the same command as before for activation, but this time with the parameter active: no.
Read More:
How to disable and enable a user account in Windows 10
Best Antivirus for Windows
The way to make Windows 10 Automatically Connect to a VPN when starts
What is Windows virtual memory and Recommended virtual memory
How to allow multiple RDP sessions in Windows 10 without modifying system files