When you upgrade to Windows 10, the process leaves you the ability to reverse the changes. If it’s been several days and you are happy with the result, it’s time to get back that important disk space.
Those who use SSD know well that capacity doesn’t come in trees and 20GB is a significant amount of space that you can use for other things. Windows 10, in the process of upgrading from Windows 7 or Windows 8.1, allows us the ability to reverse the changes in a set of files which in total occupy around 20GB of disk space.
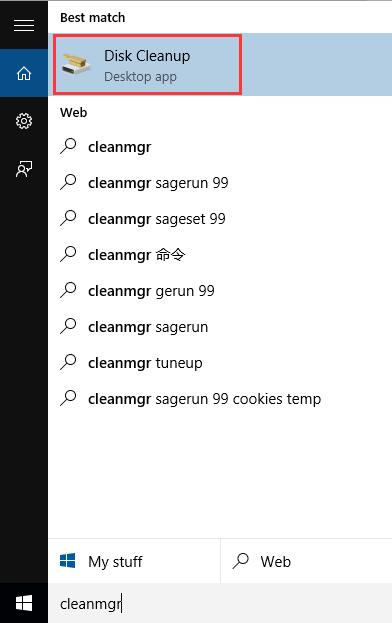
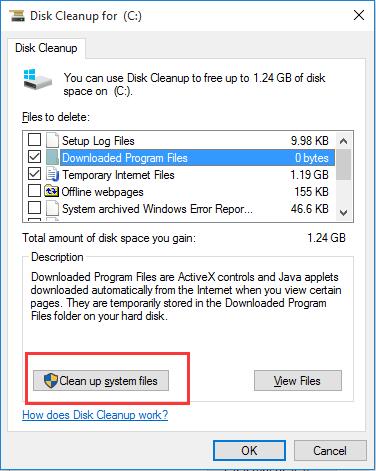
To free that disk space the best thing is to use Windows CleanUp. You can run it directly by writing “cleanmgr” in windows search box. Execute it and press the button that says “Clean up system files“. If you don’t press there, you won’t see the 20GB as an option to release.
The process will also restart by also looking for system files that can be deleted. When the process ends, these 20GB will appear as “previous Windows installations “. Select it and accept. When you run it will request confirmation to delete those files.
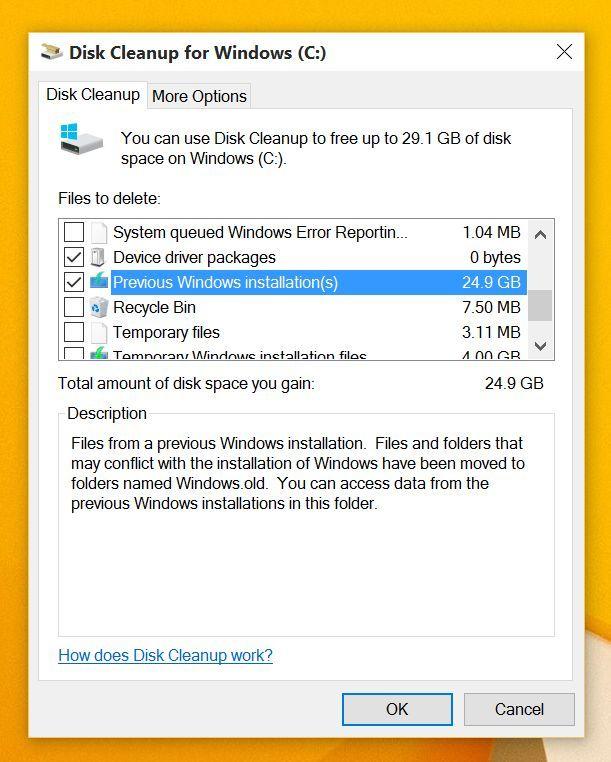
The end result will not be exactly the freed 20GB storage, but actually around 14GB. We can’t explain the why but it must surely be by the compression that Windows makes for the recovery of those files.
Read More:
Download Windows 10
How to install Windows 10 and Windows 7/Windows 8 with Dual Boot
How to create a restoration point in Windows 10