Almost everyone has its own user and password to access Windows. A measure that although it protects us so no one can access our computer and dispose of the information have in it, it’s not entirely reliable. Because in case our laptop is lost or stolen, anybody could have access to all of our information if they boot the computer through a CD, DVD or USB, or even installing another OS.
Therefore, if we want to improve our data security, besides encrypting, we can set a Hard Drive booting password and avoid that someone can start the system easily. For this, we have to enter the BIOS or UEFI and in its settings add a password to block the computer so no one can start it up without it.

According to the manufacturer, the method to access our computer’s BIOS may vary, though normally you can enter by pressing any of the keys Supr., F2, F10, F12, Esc, etc. while the computer is starting. If we don’t make this way, then check the user manual or contact the manufacturer.
How to block from BIOS or UEFI our computer so no one can start it
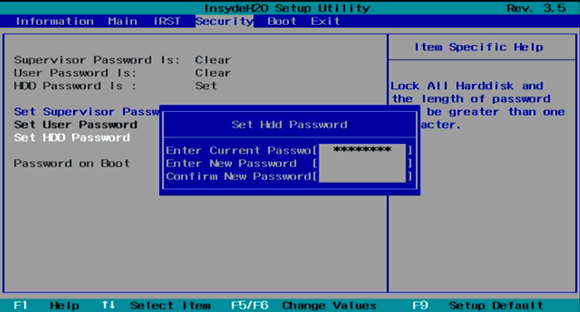
Once in the BIOS we must look for the HDD password option that will probably be under the security tab. Due to that the menu options may vary from one manufacturer to another, in case you don’t find the option, it’s advisable to check the user manual of the motherboard. Once we have found this option, we will set a safe password and after that restrict the start mode so it can only be booted from the hard drive so blocking your computer.

This option can be found under the Boot tab and we must specify that the Hard Drive will be the default boot drive so it can’t be started through a CD, DVD or USB. Once this is done, we save the changes and can check how in the next startup we have to enter the password to start the drive.
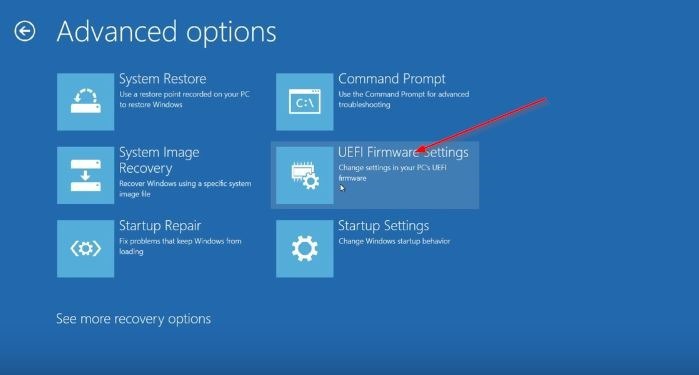
If we have a modern computer with the latest versions of Microsoft’s OS, then it’s likely that this has UEFI firmware, if we are not sure, we can make sure if our computer supports UEFI or not, following the next steps. If this is the case, then we must access the UEFI from Windows 8 or Windows 10 settings. In this same post, you can read how to access UEFI on the latest Windows version, being these really similar to the ones on Windows 8.

Once we made it to the UEFI firmware settings option, we have to press the restart option to change the UEFI firmware configuration, which will restart the system to show us the UEFI setting window. There we can set a safe password for the hard and as we di don the BIOS, the next thing we have to do is set the Hard Drive as the default booting drive.
Once this is done, either on the BIOS or on the UEFI, the access to our drive will be protected in the case that our laptop is stolen or lost.
Read More:
Best Antivirus 2017
Windows 10 free download
How to run Windows 10 from a USB flash drive