This process is simple, but keep in mind that hardware support or compatibility is limited and therefore we can find problems supporting our hardware, mainly aspects like the network card, processor, memory, etc.
Basically we should look for an x86 processor with support for 64-Bit (it does not have to be Intel), at least 1GB of RAM, Realtek or very basic Intel network card and, very important, a PC with a classic boot system, like Bios or Legacy and a storage controller type SATA AHCI or, at least, compatible.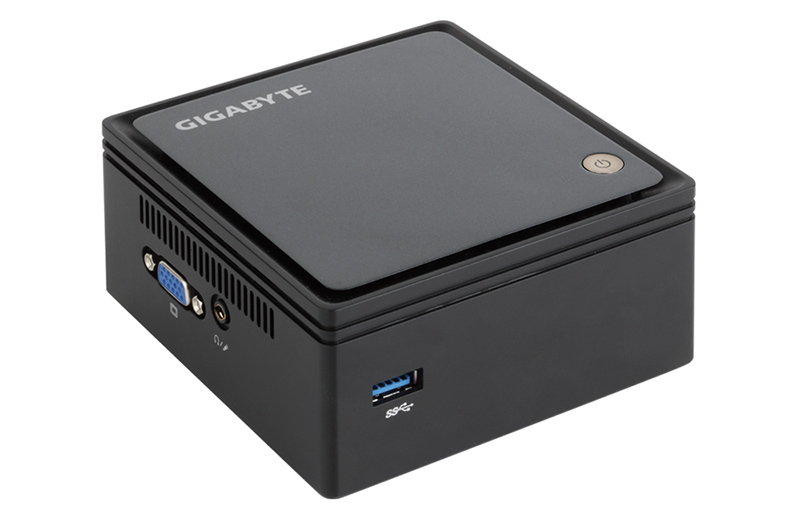
We therefore need a basic system, with ethernet, a flash drive with at least 25MB capacity (if you find one of less than 1GB it will be quite the achievement) and a main storage unit to which we can then add more units, either internal or external. As I said before I can not assure you success but i can show you the PC I used for this experiment.
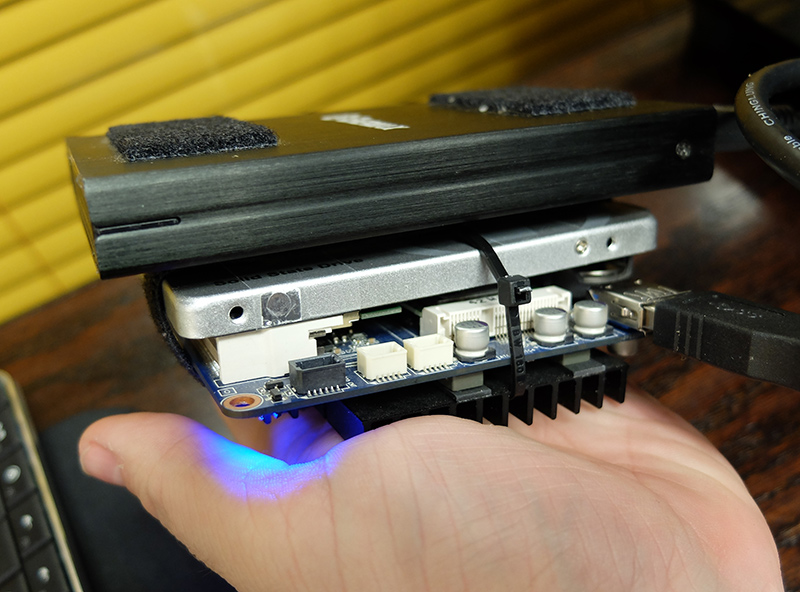
My computer has seen better times, it has been through several crazy projects, and it now looks like this. It is completely passive and using 2.5 ” units saved me having to use more power cables. I just need to feed the Brix and an Ethernet cable.
This is a veteran Gigabyte Brix N2807, which we discussed in this article, with an Intel Celeron N2807 dual-core processor, where I installed 4GB of RAM and a 32GB SSD that I’ll use to run the system. A basic system I found for less than 90 dollars during Black Friday in a well known store.
This barebone can serve as reference for this type of work, but there are more capable computers that also have a lot of tradition like the HP N54L. These support multiple units and are a powerful and affordable alternative.
We have the PC, we have a pendrive, now we need the “boot loader”, which you can find here, and a program to dump the “boot loader” image on the pendrive. We’ll then use the pendrive as a bootable, it will have to be there every time. We can also use a CD drive, another hard drive, etc. I find it more comfortable and efficient to use a pendrive, we all have a decent low capacity pendrive lying around somewhere that will do the job.
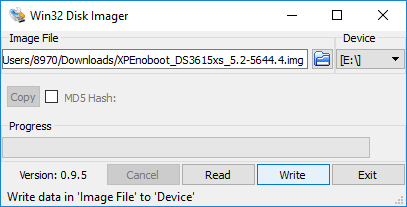
To dump the image we will use Win32diskimager, a free program that you can find here. Also we have to download the last “XPEnoboot”, in its 5.2-5644.4 version. We’ll download the .img version and write it on the pendrive using Win32 Disk Imager. It is as simple as looking for the .img file, selecting the target drive and click write. It will take very few seconds to complete and will leave us a pendrive with about 25MB of space occupied.
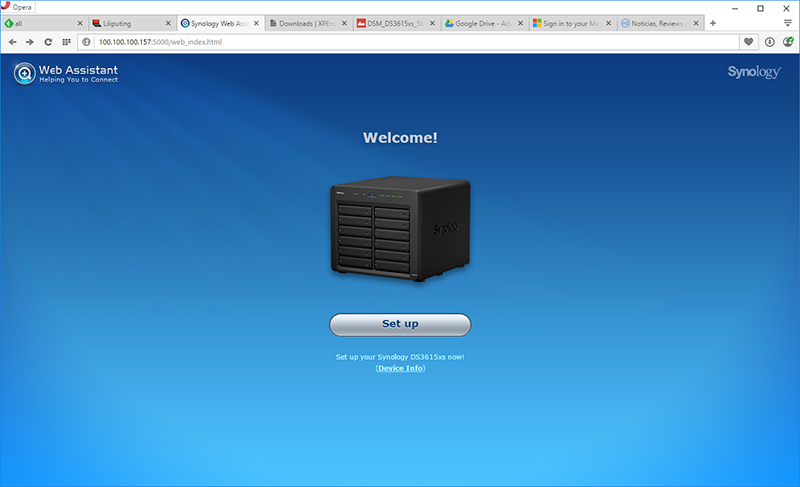
We are already past the hardest part, and that wasn’t so difficult. Now we boot the system selecting the pendrive on our bios, we’ll find three options, let the first one run that, by the way, will be the one we’ll always use to boot the system. When the loading is complete, we will look for the new NAS by going to this address: http://find.synology.com .

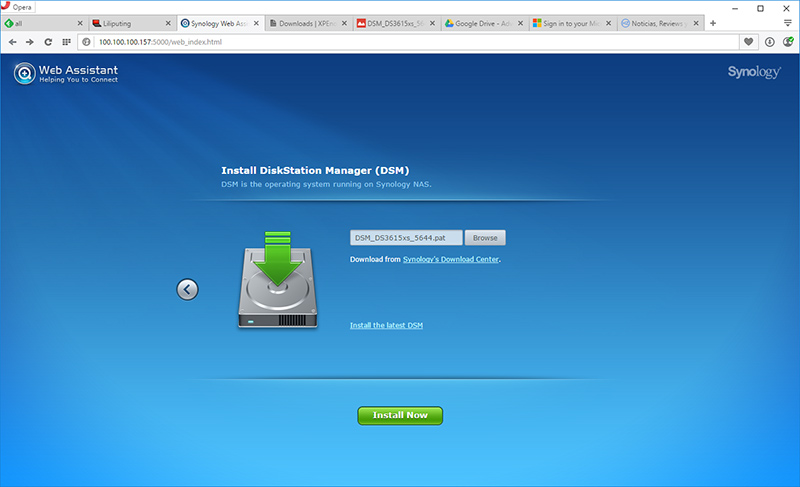
This will find the NAS, that probably borrowed an IP address with the DHCP server we have on our network. Now we have to follow the installation process that we would normally use, but in this case in manual mode. Download the latest version of the DSM operating system at this address and load the .pat to the system. If everything goes well the process will end on the typical Synology wizard where we’ll configure the user and other parameters. If that is not the case we’ll enter the NAS again using the IP assigned by the DHCP with the password field left blank or “admin”. That will forcibly start the wizard.
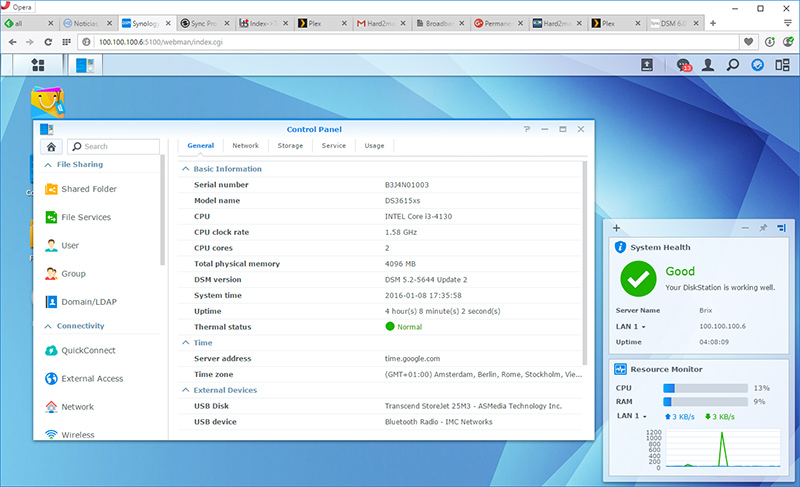
From here on we already have the fully functional NAS, although we’ll have to install some updates manually, downloading the patches from the previous link and running them from the NAS control panel.
I warn you that once you try it thoroughly you will not be able to live without an official NAS of this brand, it makes having a complete server at home or work accessible, efficient and simple. A perfect and modern way of managing data like professionals without needing the knowledge of a professional.
Work remote control ?
Synology android apps ?