Changing your laptop’s hard drive or installing an additional one is a very simple task. Here we show you how to do it and what you should keep in mind.
1: Check your computer’s specs
Before buying anything, the first thing we have to do is check our computer’s specs. This is very important since, even if you’re going to replace your existing unit, you must check the compatibility of the models that you plan to install.
For that you must check the technical specifications of your laptop online, and closely examine the storage specs. This way you will know which units it supports, although it’s not always easy to find our model, even looking at several websites. This isn’t infallible, and there will be occasions where you will have to look for another solution.
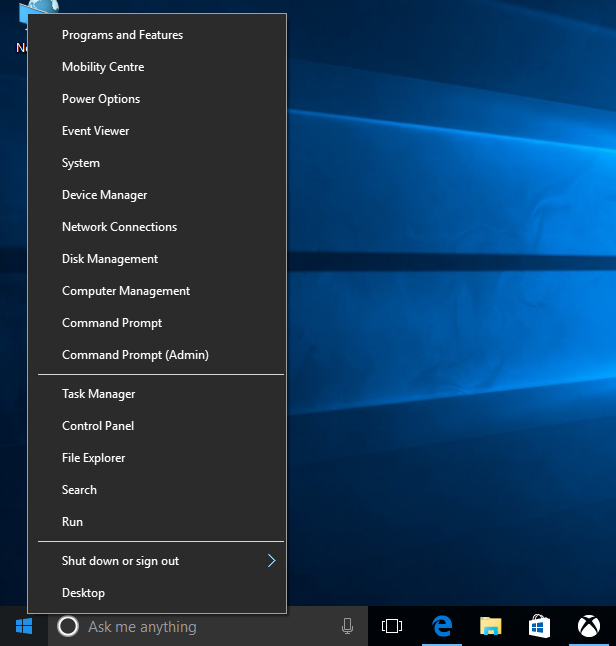
You have several options. The first one would be to enter Disk Manager. In Windows 10, you can do this by right clicking the start button in the lower left hand corner. Here you will be able to see the different partitions, but in this case we only have one unit.
To check the actual availability of our equipment, one can access the bios. It is different in each model, but usually it can be accessed by pressing F8 or F12 during the startup delete. These are the most common ways, although there are others, however, you just must pay attention at the start.
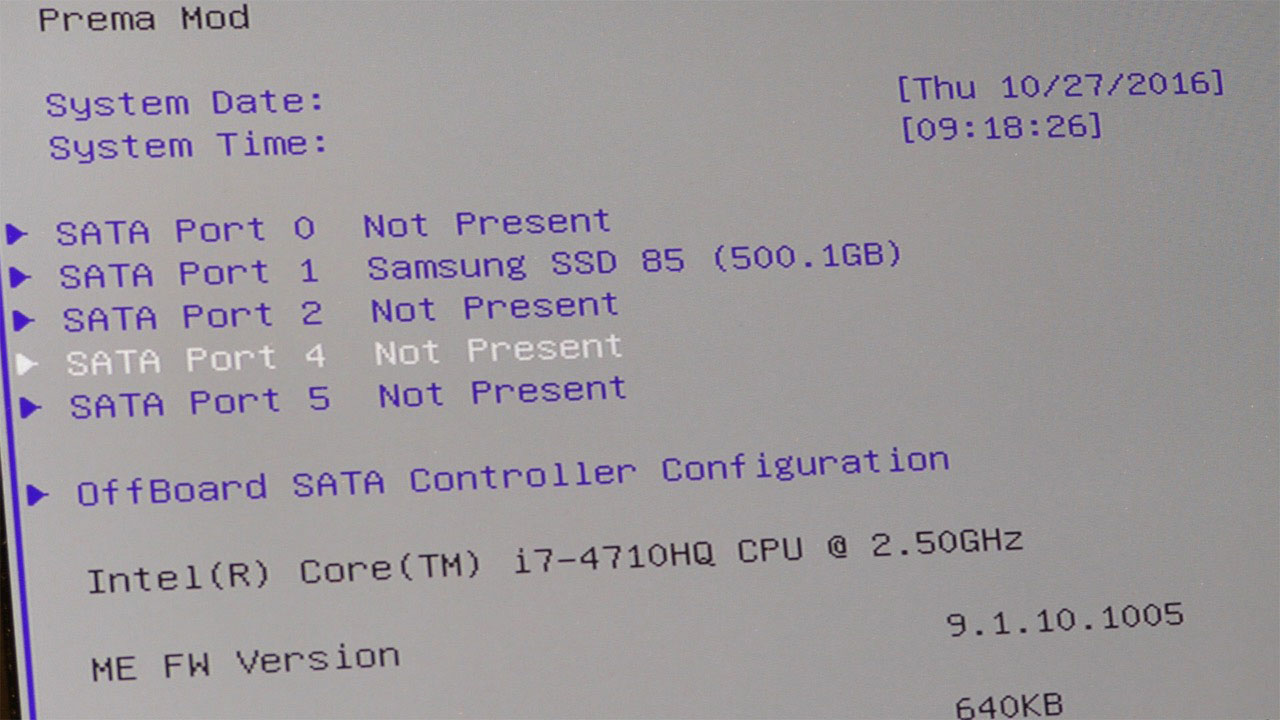
Once inside, normally you can see the default tab and all the connected devices, and the available slots. Remember that if you have an integrated DVD drive, this one will also appear as a SATA drive.
In case one may need to double check, it is best to open the cover of the disks, and check directly what there is in our equipment and what can be installed.
2: Which model to choose
The normal thing is to replace the disk of your laptop for a new one. There may be various reasons for that. On one hand it may be simply because you want to expand the storage of the laptop. Another reason is that your unit may present significant degradation or too many defective sectors, hence it needs a replacement. There is also the possibility of mounting an SSD on the laptop, which brings forward a spectacular performance improvement. (Read More: Best SSD)
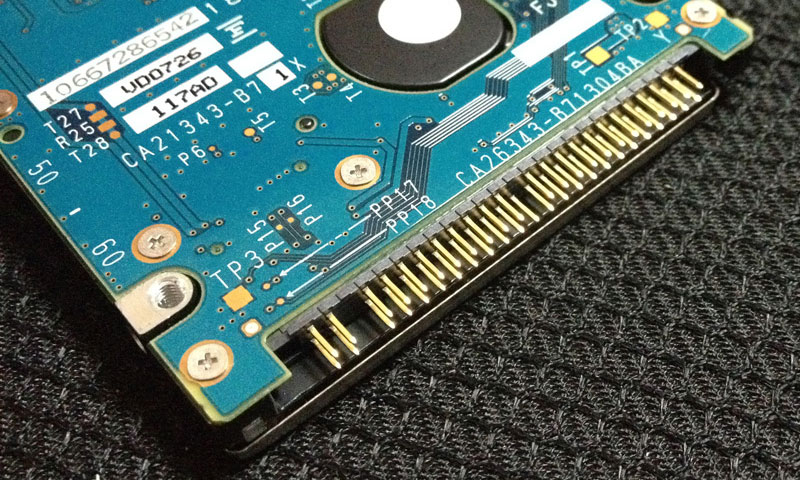
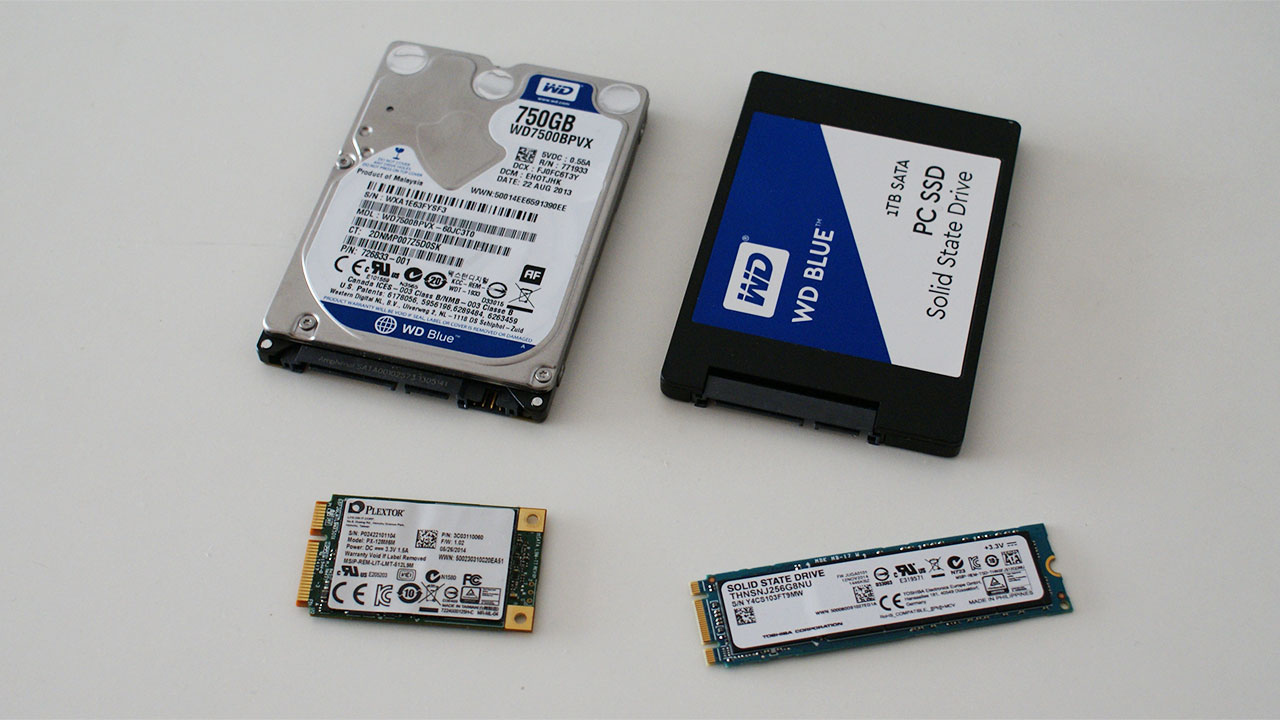
If you are going to change the hard disk of your laptop for an SSD, normally you will have no more problems, although if it is too old you should check that the laptop connection is SATA, since if it is IDE, there are few units available, although fortunately some can be found in online stores.
One factor to keep in mind is the thickness of the disk, since some modern computers are so thin that they need a 7mm thick hard disk, instead of the traditional 9.5mm 2.5 “disks. The first ones are somewhat difficult to find, although now we have 1TB and 2TB hard drives at reasonable prices. You will not have this issue with the 2.5 “SSD, since all of them are 7 mm.
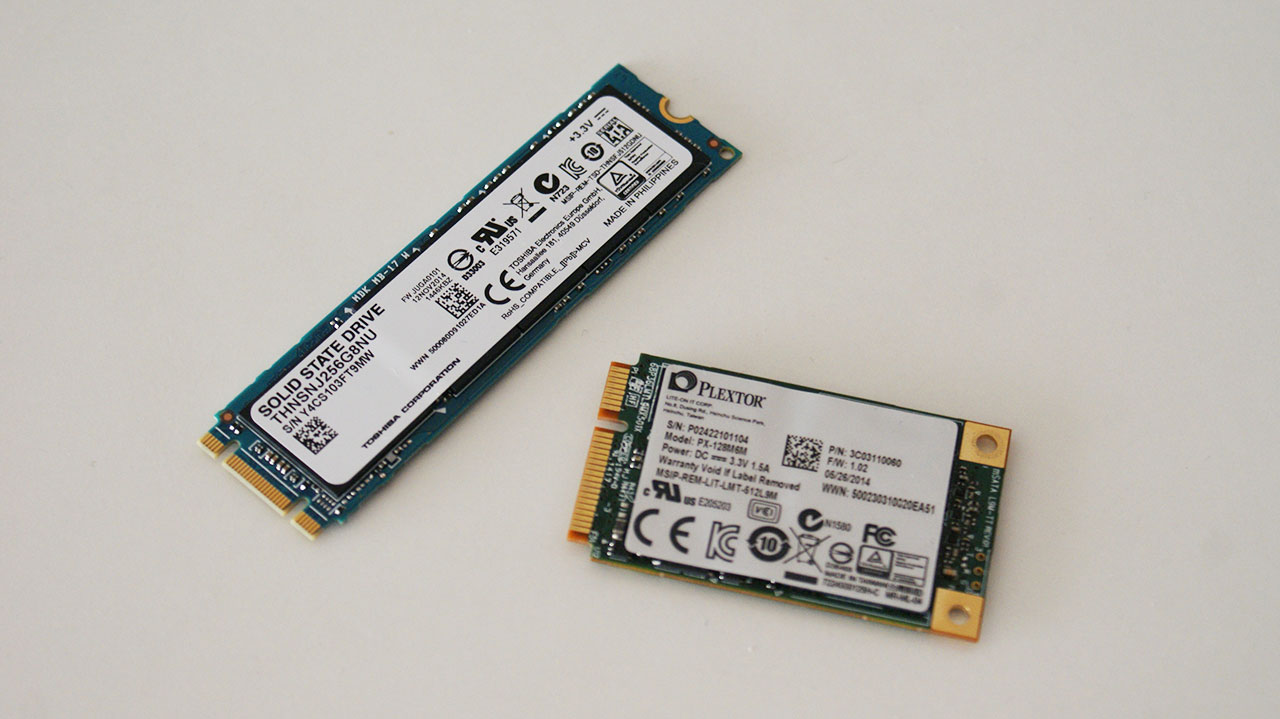
If what we want is to keep our disk, and we have verified that we have a mSATA slot, it is possible to find the mSATA units, although their stocks are increasingly limited as this feature will not be as common in the new format M.2, yet providing not only better capacity, but also better performance thanks to the new NVMe protocol that is capable to read and write speeds more than 3000 MB / s.
3: Connect the disc
Although many computers do not allow easy maintenance of the fan and CPU, it is very common that they have a simple access to the disks. It is common to find a dedicated cover to this type of units and RAM, the two components that are usually changed in laptops.
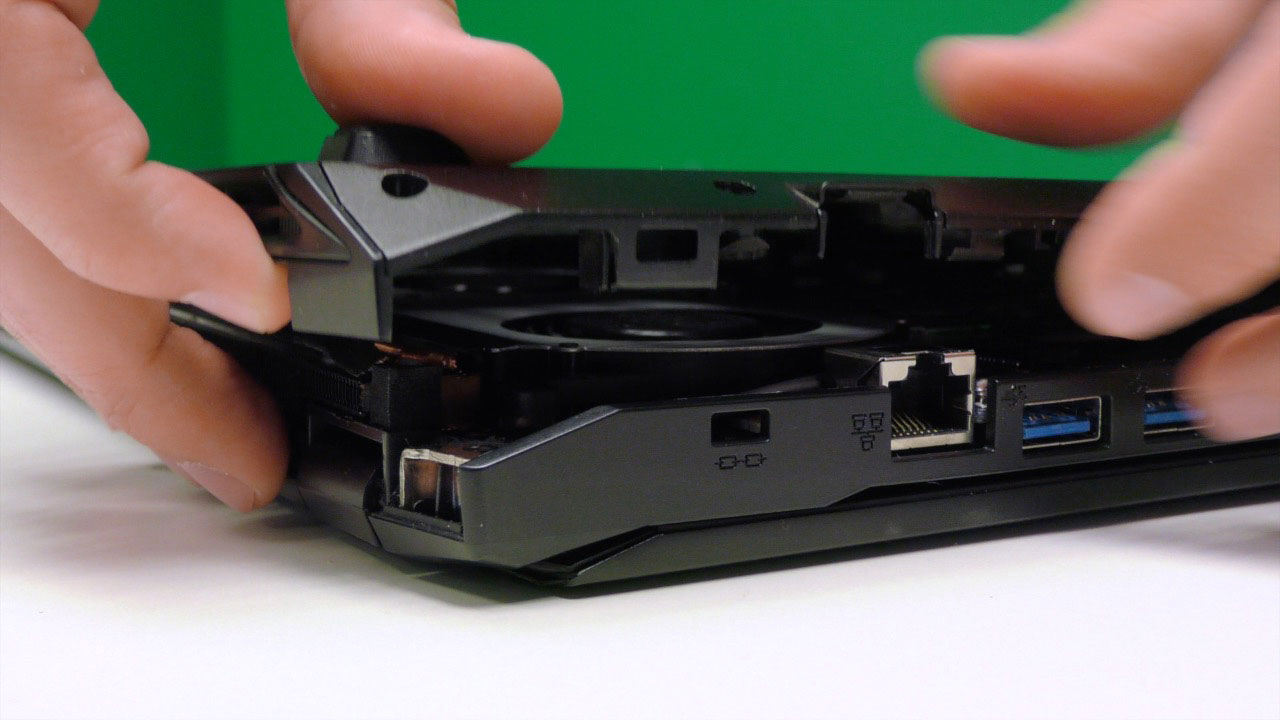
Other models will have to remove the full lid, while some ultrabooks are so thin that they will only allow 2.5 “and 7mm thick discs in the best case, while the most normal is that we only have one slot for A main SSD with mSATA or M.2 format.
If we talk about a midrange laptop, after removing the lid we will see the space to accommodate the disk drive. If our laptop has an internal DVD drive, we could replace it with a caddy for an additional disk, with which we can connect a second drive in our computer, something really useful, given the disuse of DVD players.
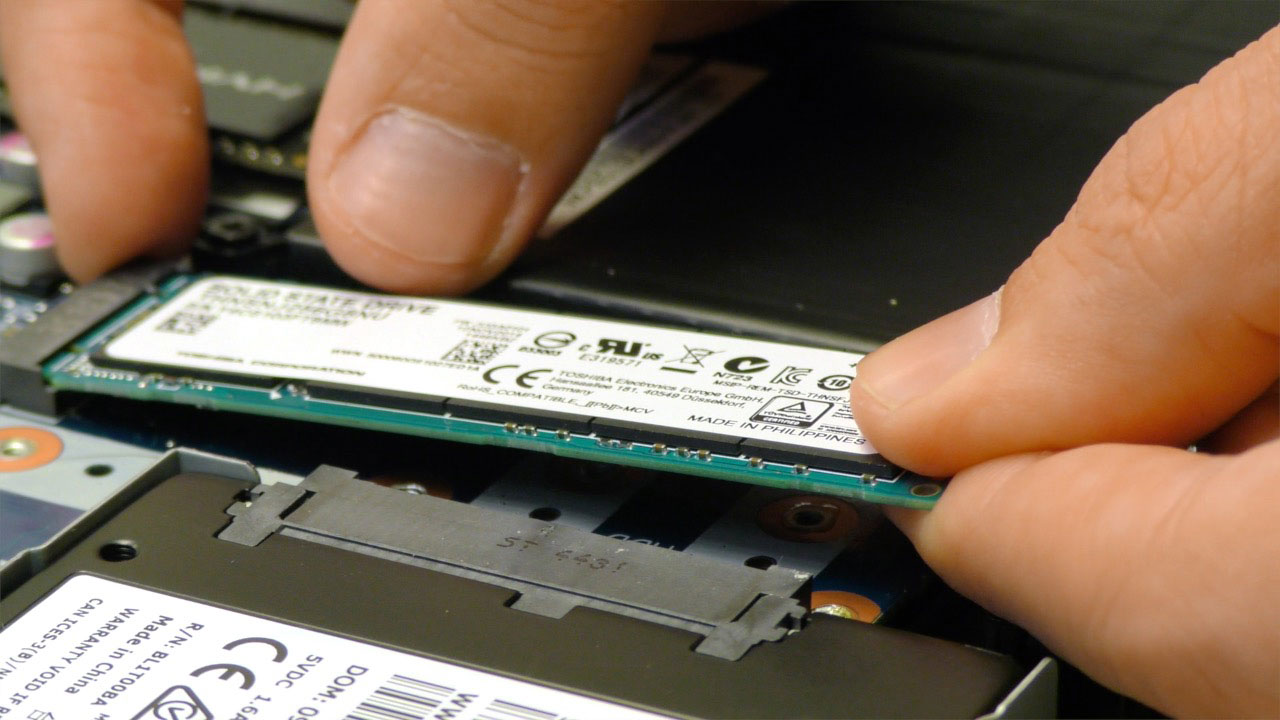
The connection itself does not have any complications and it is only to fit it in its corresponding place, and screw it in if necessary. In mSATA or M.2 disks, it is normal for the space itself to have the hardware ready to place the units.
Once the disk is in place, we can close our laptop again and turn it on again to run our new unit.
4: Configuration on the system
At this point the disk detection is automatic. In fact, as soon as you connect the bios you will see it. Otherwise you will have to check the connection, since it could have been due to an error.
If you have replaced the original disk, we will have run out of operating system, so you will need to reinstall everything again. Check that you have all the drivers of the equipment ready for installation. The disk detection in this case will be immediate, and selecting where to install the system will be the only option available.
If you added another hard drive, chances are that the new drive does not appear in the operating system. You have to access Disk Management as we showed before, right clicking the Windows start button. Then you will see the new disk appear, although it will appear black out and without any letter assigned.
It is likely that when you open the Disk Management it will ask what kind of partitioning we want to apply to the new disk, you can choose between MBR and GPT, which comes by default, and is the option you should select.
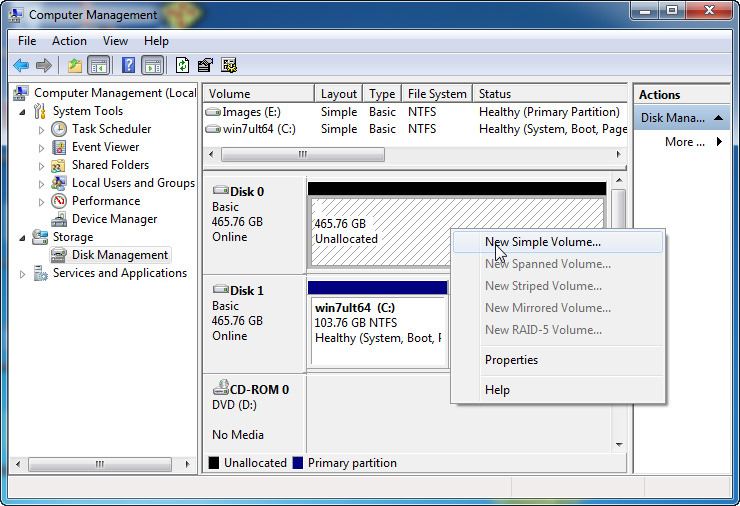
If this popup window does not appear, but you can see your new drive in black, you have to right click on the disk, click New Simple Volume, and now just follow the steps, set the size of the partition, and assign the drive letter. In a few seconds we will have the unit ready for use.