 If your PC is slower than usual, the OS and apps experience random errors, you cannot access some of your files and folders or the web browser struggles to get rid of weird ads, then perhaps some kind of malware has taken your PC hostage, preventing you from using the computer as usual and putting your personal and professional data at risk.
Virus, worms, Trojans and other malicious software are on the prowl for PCs and networks of every platform. The risks for hackers are minimal in contrast to the benefits. The age of mobility, automation, smart cars and the internet of things has greatly increased the number of connected devices and improved the way of storing and accessing information either with or without a PC.
Hackers have seen a great opportunity, as creating malware software and investing in attack methods are on the rise. Techniques are being constantly improved, causing spam, data theft, invasion of privacy and overall damage to companies and users.
Although prevention is the first and main line of defense, it is not always possible to stay safe from infections. Any user might have had bad experiences with malware even without being alerted by a security software.
If you fail to install a security solution on your PC (or if a virus or Trojan is preventing you from installing one) or if your antivirus has not detected any malware, then cleaning your PC can be difficult and take a long time depending on the threat. In order to face threats, we will show you how to do it in this guide. We hope you find it useful. The aim of this guide is removing malware from a Windows PC, although the overall process is usually used the same way in other systems.
1. Try to save your data
Regardless of the type of infection, the first thing to do is to stop using the PC and create a data backup. Backups are the greatest ‘lifesaver’ when it comes to countering any sort of virus, and sometimes they are the only solution against some threats. If you had not made a backup before, you can try to back up documents, photos, videos and any other type of personal and professional data that you cannot afford losing, even if they are infected so you can try to restore them later in a clean system.
Included in this group are those files that are highly affected by ransomware (usually encrypted files), but we even have to create a backup for those files so we can try to restore them when the needed tools to decrypt them become available. Evidently, we just have to copy the files on a controlled external drive without opening or pasting them in other computers until they have been cleaned because they can infect other PCs.
1.1. Safe Mode backup
A common trait of any PC virus is that they are executed when the system boots up. In order to limit damages and be able to save important data, we can start Windows systems in safe mode.
Windows’ safe mode, also called ‘troubleshoot mode’ or ‘advanced startup’, is a way to boot up the system with only the most basic controllers and services, which is useful to find and solve any OS problems that are not solvable during the normal startup. Up until Windows 7, accessing the safe mode was as easy as pressing the “F8” key during startup. To boot into safe mode in Windows 8/8.1 and Windows 10, you have to follow the steps in the links.
If you have booted into safe mode, copy the data into an external storage device, ideally a flash drive, a USB hard drive or a CD/DVD. If you manage to copy your most important files, go to item number 2. If you were not able to boot into safe mode, keep on reading.
1.2. Use Live USB and Live CD to back up files
Live USB is a USB flash drive containing an OS. It boots automatically and it is independent of the PC’s OS. We do not have to install anything on it. This allows us to isolate most types of malware and access the computer to back up files.
 We can find a lot of software solutions to create a Live USB or bootable flash drive. Most solutions are free, open-source and multiplatform, especially for being created using Windows and Linux. To do this, we can use our preferred app to burn the image to a CD/DVD or USB drive. For example, we can use ImgBurn for CD/DVDs or UNetbootin for USB drives. To burn the image, you can use Ubuntu’s official tutorial, although it is as easy as running the app and selecting the ISO image that we downloaded. The app will do the rest.
1.3. Run Live CD to create backups
We boot the computer through the recently created Live CD. If we had not done it before, we will have to go into the BIOS and configure it to boot from a CD/DVD or USB instead of the SSD or HDD where the OS is installed.
Live USB and Live CD use RAM memory without starting the OS, controllers, apps or services of the infected PC, allowing us to isolate malware. Once the OS boots up, we can access the storage unit and copy files to an external storage unit, flash drive or USB hard drive. Remember you cannot use these files or copy them to other computers before they have been scanned and disinfected.
2. Malware disinfection
Once our most important files are safe, it is time to remove the PC virus. It will not always be possible, as it depends on the malware. We do it as follows:
2.1. Create a rescue method against virus
A rescue disk against PC virus is something that every user should have in their software library. The process is similar to the one used to create a Live CD. In fact, it is the same thing, but in this case we get a specific antivirus solution.
There are a lot of solutions to use, including general rescue solutions like Hirens and Ultimate Boot. However, we will recommend you some of the best free solutions against virus on the market.
Every big security software vendor offers the possibility of creating said methods. The majority come in a Live CD format based on Linux (which are created on and can be booted via optical drives, flash drives or external USB drives) that we can use on our PC, regardless of the OS, without needing to install anything on it. The best solutions that we can use are:
- Kaspersky Rescue Disk
- ESET SysRescue Live
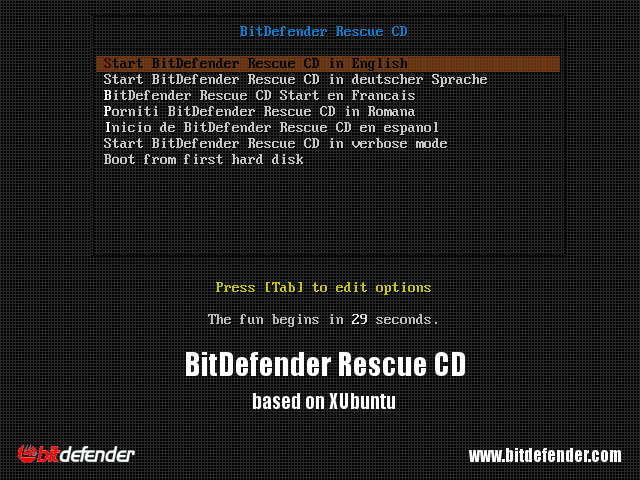
- Bitdefender Rescue CD
- AVG Rescue CD
- Panda Security
- Trend Micro Rescue Disk
- Norton Bootable Recovery Tool
- Avira Rescue System.
- F-Secure Rescue CD
- Avast
2.2. Boot the system with the rescue disk – disinfection
We have to boot the system with the rescue disk that we created. Most rescue disks are based on Linux, and they have a really simple interface. Also, they usually update their virus database automatically. Once you accept the terms of the license agreement, the antivirus will begin scanning the system, removing any malware it finds. We can access the unit where the main system is installed through the Live CD’s file explorer. This useful if we want to delete any file or back up directly any important file, as we saw in the previous section.
3. Recovery
If you removed the malware successfully, then go to items 3.1 and 3.2. Otherwise, do not lose your time, as we will have to “take the bull by the horns” to recover the system by other means.
3.1. Boot the system
Remove the rescue disk and try to boot the system as usual. If we do it successfully, we will try to install the best security solution available to scan the system and make sure it is clean.
3.2. Check the data and apps
If the system works as usual, check if all the apps that you had installed function correctly. Do the same with the controllers and the drivers because there might be some damage even if the OS is clean and running.
3.3. Reinstall the system
If you are not able to remove the infection despite our efforts, the only remaining option is to reinstall the OS. If we have a recovery partition or system drives, then that is the first thing to use in order to restore the PC to its out-of-the-box state. Systems like Windows 10 have greatly improved the way they restore a PC to its factory settings.
If we do not have these means, we will have to perform a clean install of the entire system, formatting the partition to remove the virus successfully.
3.4. Restore your files
Scan and disinfect the backup files thoroughly. Make sure that they are completely clean before copying them back to your PC since they might be the cause of infection, making you repeat the whole process. The same goes for the apps you want to install.
4. Prevent further damage
4.1. Scan the PC in depth
The system partition is now clean, but we also need to check the rest of the partitions and the entire local network to see if the virus came that way, thus infecting the PC again. To be sure, you can use the rescue disks created previously and any security software installed on the PC. There are a lot of good-quality solutions, and some of them are free.
Nowadays keeping a PC clean is complicated without any additional protection, even if we try to be as careful as possible. At least try using Windows Defender, which comes with Windows systems, to work along with the firewall. You can also use free online scanning tools like Bitdefender QuickScan, ESET Online Scanner and Kaspersky Security Scan.
4.2. Change passwords
There are no traces of the virus, the PC is clean and your files are safe. However, a lot of current malware threats infect PCs to steal passwords. It is not unlikely that third parties already have your passwords despite your system being clean.
Therefore, it is highly recommended that, after being infected, you change all your passwords: from the local Windows user password to the ones used in Internet services, especially those used for financial services and e-commerce.
5. Prevention
Lastly, we insist on telling you that prevention is the first and foremost line of defense. As every time we talk about security, being cautious is the best way to protect your PC against malware. Pay attention to elements like:
- Downloads
- Installing apps from unsafe sites
- Web browsing
- Opening emails or unwanted attachments
- Using outdated versions of apps like Java, Flash or Reader, as they could be used by hackers
- Pondering encrypting you data
- Being cautious of free Wi-Fi networks
- Managing your passwords well
- Keeping your apps and OS up to date
- Creating backups periodically
- Enabling System Restore