There are a number of VPN programs which allow the user to connect to secure servers located around the world. While this option is relatively straight forward, it is also possible to easily connect to various free VPN servers by directly configuring the connection within Windows.
The usefulness of Virtual Private Networks is no longer in question. They allow companies to create secure connections between terminals sometimes located hundreds or even thousands of kilometers apart. But, for us mere mortals, VPNs are indispensable for changing our IP address, but also, and especially, for being able to surf in complete safety without running the risk of having our data intercepted by third parties, something which can easily occur when surfing from a public WiFi connection for example.
You are probably already familiar with VPN clients which offer a simple interface, allowing you to easily connect to VPN servers. However, the best solutions are often paid solutions and are most of the time servers with maximum connection times or bandwidth limitations.
If you would prefer to configure a VPN connection manually within Windows, this can be done without any great difficulty, and there a number of free servers available to choose from.
Configuring a VPN connection within Windows 10
It is possible to do so with just a few clicks, provided that you have a server address as well as the information required to connect to it – allowing you to transmit and receive data though it.
Windows 10 supports 4 protocols: PPTP, L2TP/IPsec, SSTP, and IKEv2. Before attempting any configuration, you will need to acquire the address of a VPN server. There are many websites offering free servers. In order to find one, you can perform a Google search for “free VPN servers”, for instance.
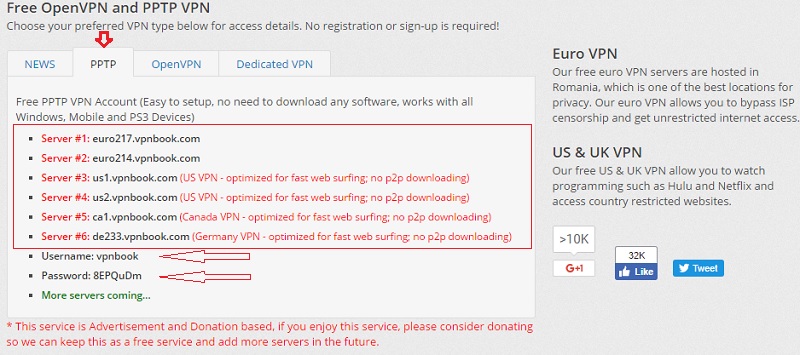
For our specific example, we will look for a server on the vpnbook.com site. It offers a small list of free VPN servers. In the tab labeled PPTP on the home page, choose a VPN address and take note of the user name and password (which changes on a regular basis; come back here to verify the password if you are no longer able to connect).
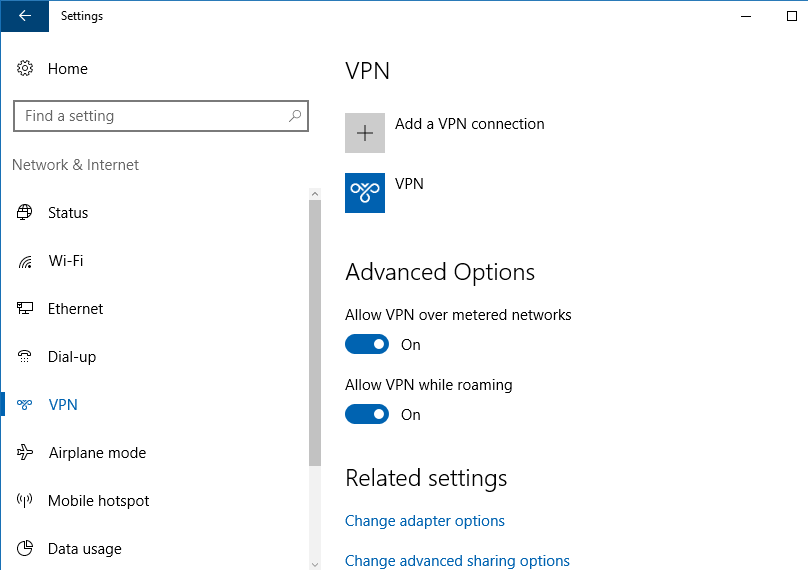
To configure a connection within Windows, you will need to go to Settings > Network and Internet. Then, click on “Add A VPN Connection”.
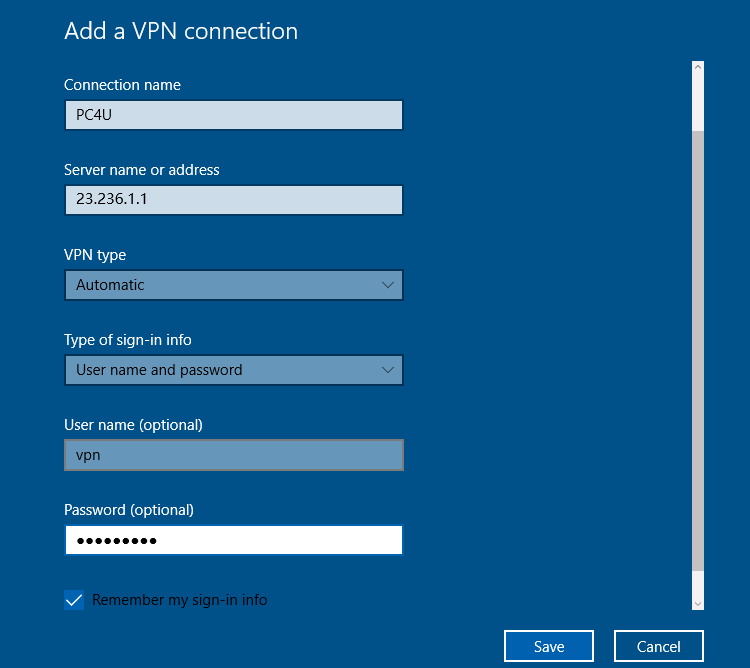
On the next page, input the information in the following way:
- VPN provider: Choose the option “Windows (built-in)”.
- Connection name: Name the connection however you like. For example: “Myvpn”.
- Server name or address: Put the server address here. For example: us1.vpnbook.com.
- VPN type: Choose the corresponding VPN type. In our example that means PPTP.
- Type of sign-in info: Choose user name and password.
- User name: Input the serve user name. In our specific example this is: vpnbook.
- Password: Input the server password.
- Tick the box labeled “Remember my sign-in info” and then click the button labeled “Save”.
After completing these steps your VPN will have been configured and will appear with the name you assigned to it (Myvpn). Select the newly created VPN and click “Connect”, its as simple as that. If the connection can not be established, try with a different address. (With vpnbook, US servers are often the most stable).

To modify the configuration (change server, insert a new password, etc.), you will need to click on “Advanced Options”, next to the “Connect” button, and then on “Modify”.
Lastly, you will need to verify that you are indeed connected to the VPN. In order to do so, all you need to do is to check whether you IP address has changed. Open your web browser and navigate to the site https://www.google.com/search?q=what%27s+my+ip
Read More:
Best VPN for Gaming