Only two days are left till the launch of PlayStation VR. Yesterday, we already told you what you need to dive right into the world of PSVR and what games you can preorder on Amazon. Today, we are going to show you how to quickly set up your PSVR system. Sony has produced three short videos on this topic which make sifting through the manual all but unnecessary.
How to Set Up PSVR
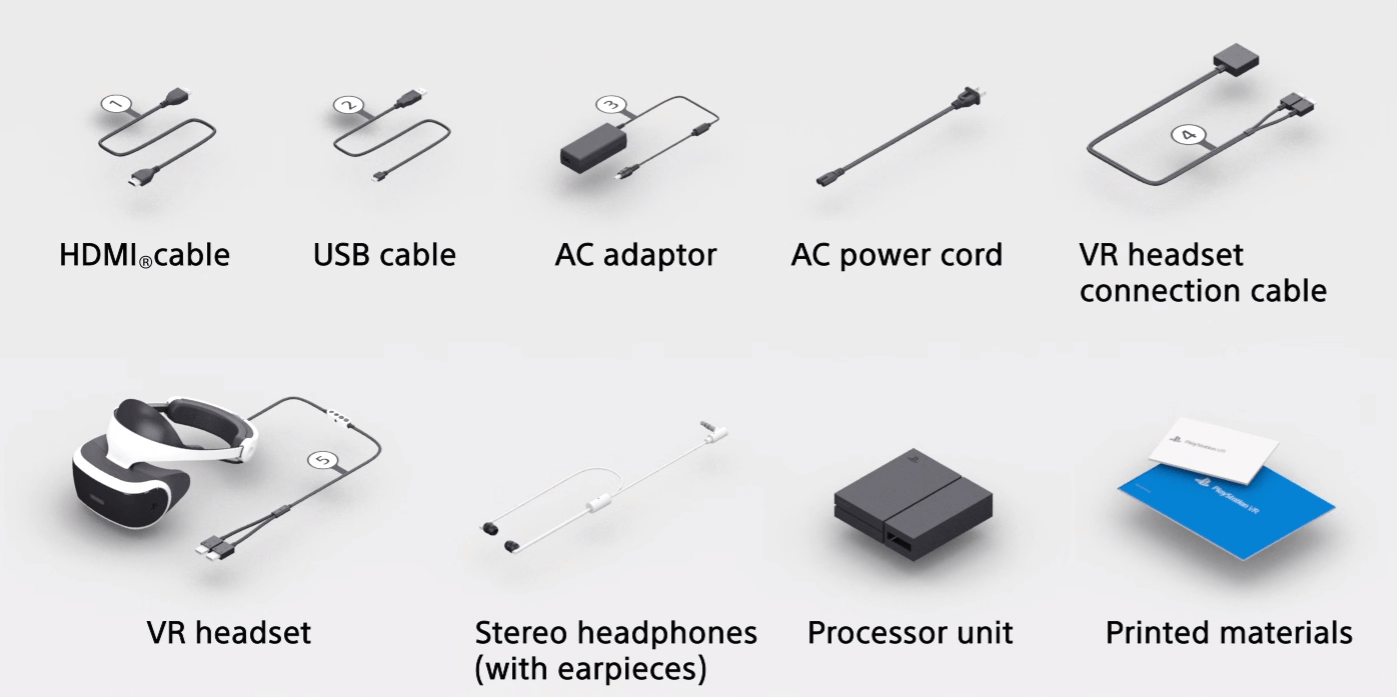
In the first video, Sony shows you what comes in the box. You should check if your headset comes with all the necessary accessories upon arrival and nothing is missing. This happens very rarely but it’s still worth checking.
Here’s what should come in the box:
- PSVR Headset
- Manuals
- Processor Unit
- USB-Cable
- AC Adaptor
- Mains Cable
- HDMI Cable
- VR Headset Cable
- Headphones

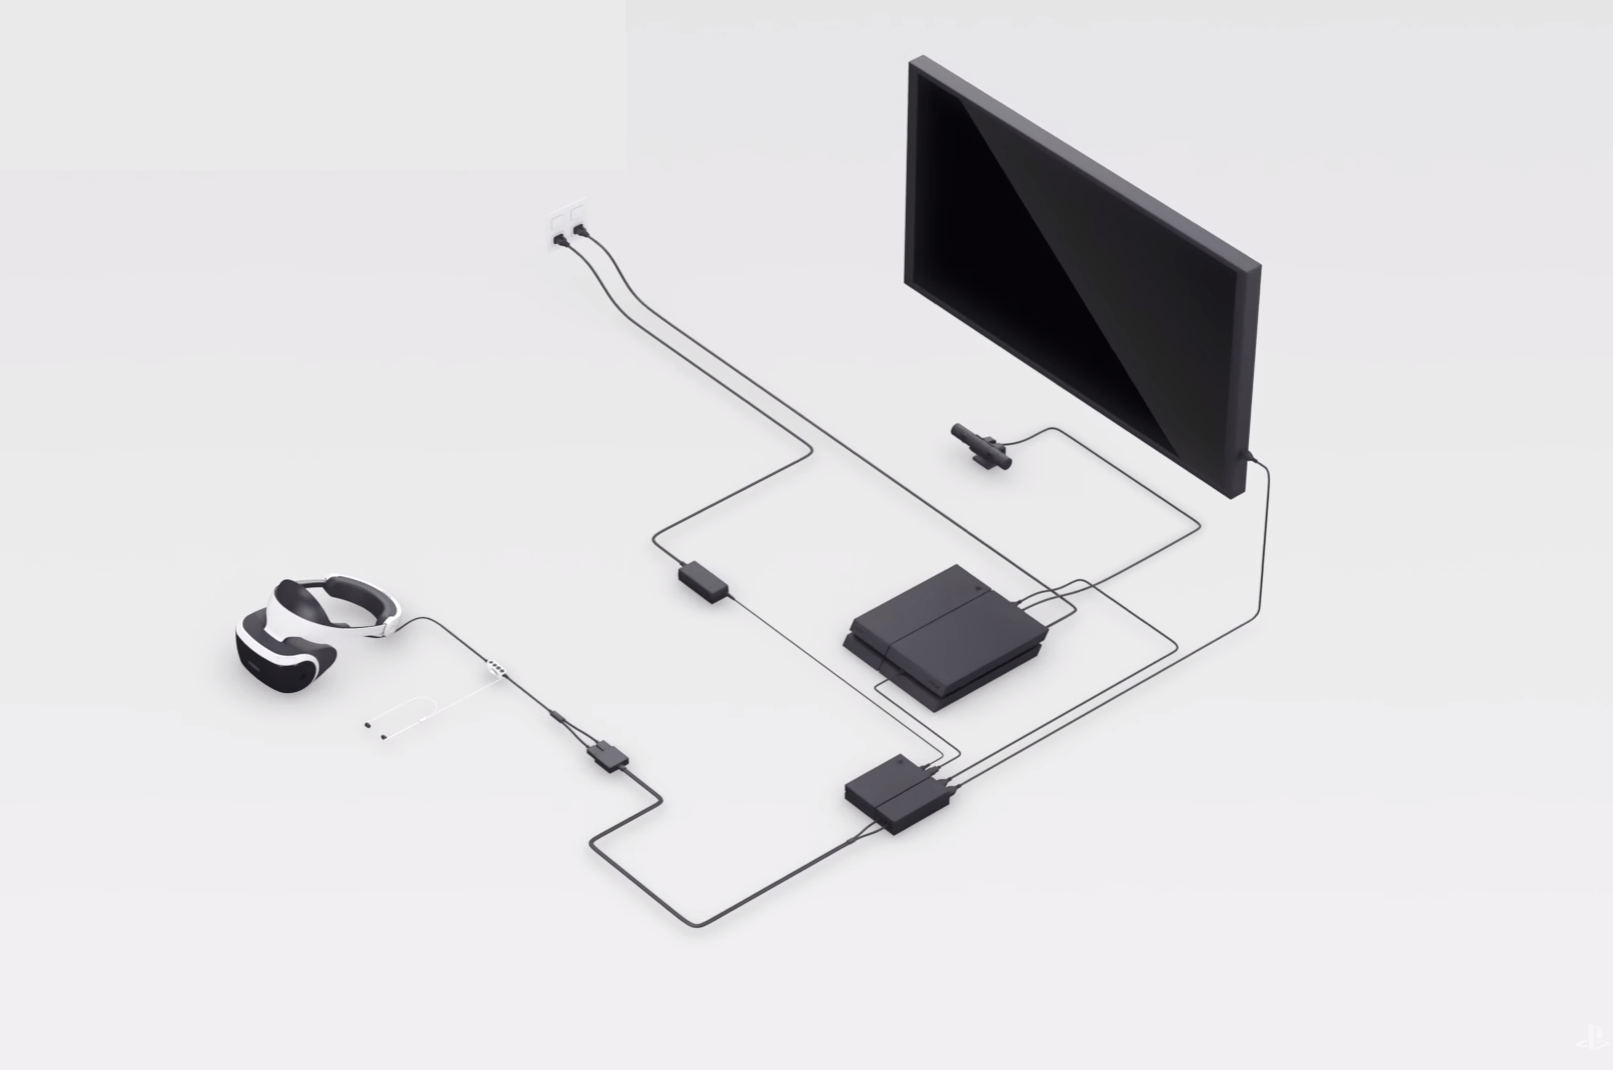
The second video deals with wiring up the system:
- Connect your PlayStation camera with your PlayStation 4
- Pull the old HDMI cable out of the PlayStation 4 and connect your TV to the Processor Unit.
- Connect the Processor Unit to the PS4 using the supplied HDMI cable.
- Connect the two using the included USB cable as well.
- Connect the mains cable to the AC adaptor and connect the power cable to the Processor Unit.
- Pull back the right side of the Processor Unit to reveal the connectors used for the VR headset. Plug in the headset connection cable here.
- Pull the right side of the PU back into place.
- Plug the other end of the cable into your PSVR headset.
- Plug the headphones into the little in-line remote control on the cable.
- Start your PS4, your TV, and last, the PSVR headset.
- When the headset lights up blue, everything’s ready to go.

The third video shows you how to get the maximum playing comfort with PSVR
- Make sure that your PlayStation camera sees the entire area you’re playing in
- Remove any objects from around you that might confuse the camera
- When you leave the image of the camera you will get a warning message
- Darken your room
How to put on your headset:
The PSVR headset should not simply be thrown onto your head. There are two buttons and a wheel to adjust the fit.
- The circumference-button on the lower right side
- A button to loosen the band found on the back of the headband
- A wheel on the band
To make it as comfortable as possible, follow these steps:
- Press the circumference-button on the lower right side
- Press the button loosening the band and then manually tighten it to fit
- But on the headset and fine tune the the tightness of the band with the wheel
- While pressing the circumference button, pull the headset firmly to your head
- To take off the headset simply press the button to loosen the band
- After all this, use PSVR setup to customize your settings for the optimum viewing experience.
- If you want to change the setting later, just press the PlayStation button and select the PSVR settings
Enjoying a regular PS4 game or video with your headset
- Put on the headset and look straight ahead
- Press and hold the “Option” button to reset the image
- Now, simply select the desired software or video
Read More:
PS4 vs. PS4 Pro
Is The PS4 Pro Worth Upgrade or Buying?
Google Daydream View vs. Samsung Gear VR, which is Better?
PlayStation VR: Ultimate Tips and Tricks