Maybe at some point you will note that our computer is filled with data too often (and you have to resort to using external hard drives or USB flash drives to extract files and information) or that you can’t install more applications, games or working with large files due to lack of space.
[toc]Then this is perhaps the best time to consider buying a new internal hard drive. These components allow you to extend the storage space of the computer, in many cases, without having to change anything in the current computer. We help you do this, step by step.
What are internal hard drives and where are they located
A new internal hard drive can be installed in several ways: to use as a primary drive and directly install the operating system (and thus you have all the new free space along in a single partition), or as a secondary drive, to complement the one that you already use as the system hard drive (where the operating system is installed) and using the new space to store data (movies, programs, photos, etc).
Installing an internal hard drive is simple and any daring user can do it, with the proper tools (which are usually limited to a simple screwdriver).
Current hard drives use a data interface called SATA III, which is capable of a 6 Gbps transfer rate, which is up to a theoretical limit of around 700 MB/s of data stream.
Typically, hard drives have different sizes and different capacities, depending on the computer you want to install it on. The most known are the mechanical hard drives that use magnetic plates to store information, usually 3.5 inches in size, that now usually have 1 or 2 TB of storage capacity.
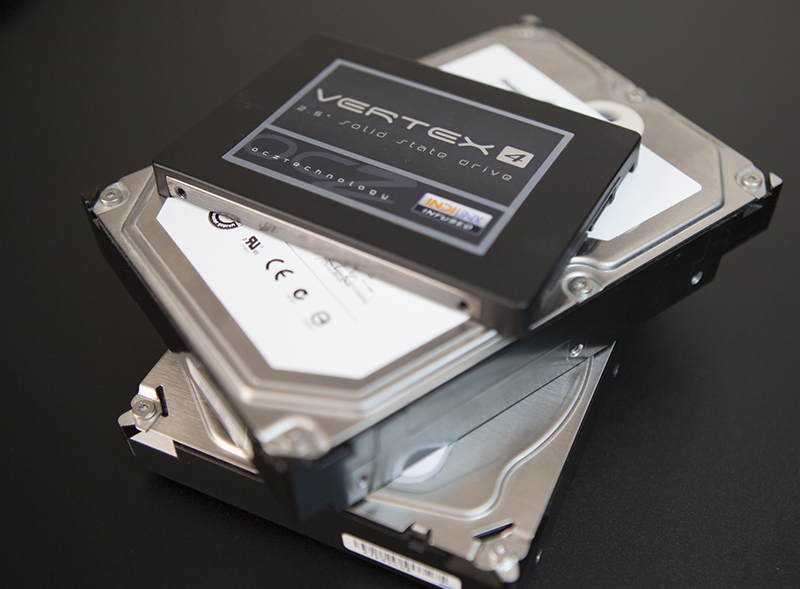
Internal hard drives for notebooks are somewhat smaller in size, remaining at 2.5 inches, and interestingly are the same as those used to make external hard drives that are so successful right now. Their capacity is often similar to that of larger internal drives, but the price is usually somewhat higher than these models.
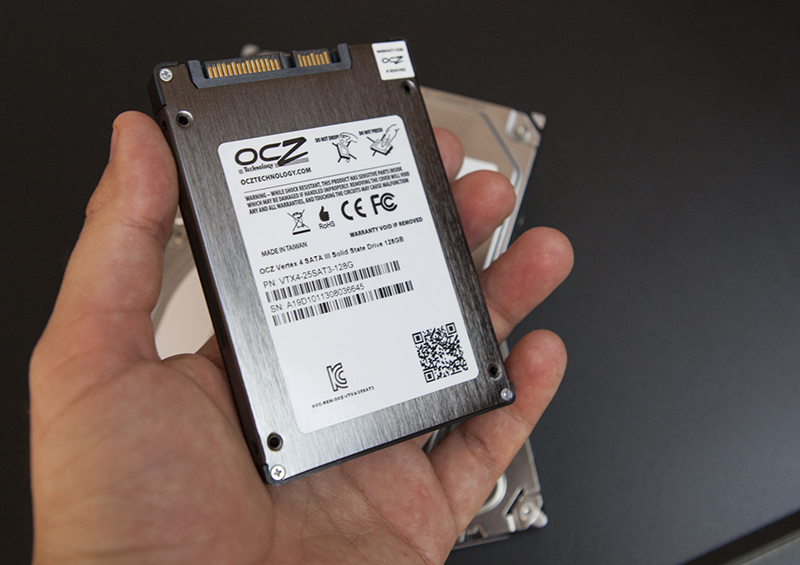
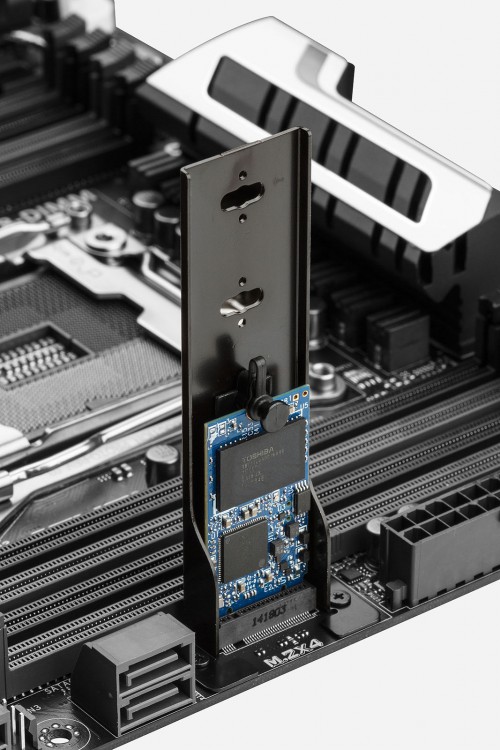
Finally, you can find the latest hard drives models, such as the SSD (solid state drives) or the M.2. These drives are, so to speak, like giant flash drives: they don’t have mechanical drives inside, but rather flash memory. They are much faster than mechanical drives, have less physical size (usually 2.5 inches), but they have a lower capacity than mechanical drives (it’s rare to see 1TB SSDs). They are also more expensive.
SSDs can be used in both desktop and laptop computers thanks to its small size and they work with a SATA connector, while M.2 discs, being “memory sticks”, are normally used in new-generation laptops or ultrabooks, as they have their own connector.
There are also hybrid drives, which in the same body, include an SSD hard drive and a mechanical hard drive, the ability to use the SSD as a place to dump the main data load (so the system runs smoothly) and the mechanical drive to store most remaining data.
How to install an internal hard drive
First you need to review that you have the proper tools and components, i.e.: screwdriver, SATA cable, power cables at the power source of the computer (if desktop) and size adapters (if the hard drive is too small to fit into the computer).

Before getting down to work, it is important to know that this process must be performed very carefully through all the steps and with particular care with the parts, as these are fragile and can be affected by bumps, bad connections and even static electricity. You know that you are fully responsible for what happens in the course of the installation.
Installing the hard drive on a desktop

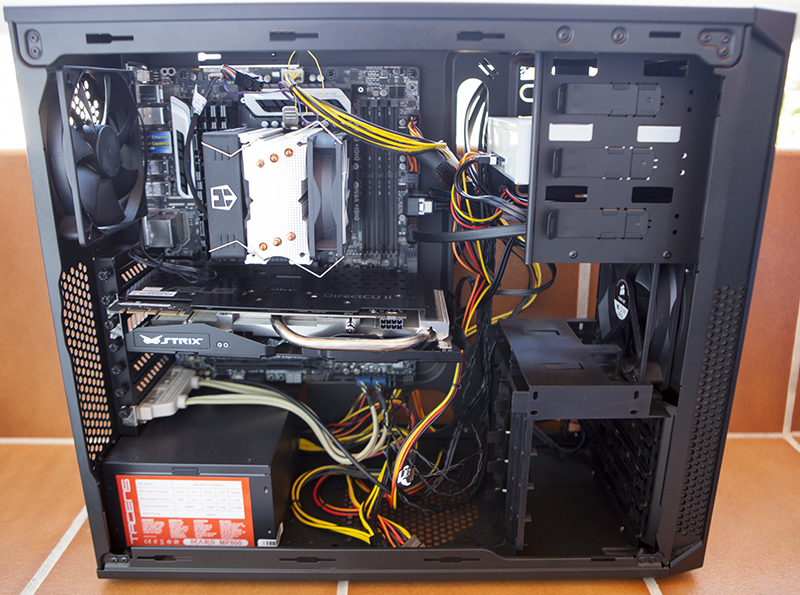
After removing the top of the tower case, you must locate the hard drive bays, usually placed at the bottom front of the same, just below the DVD players. On the computer that we used in these example pictures, you can see how the tower includes adapted bays for 2.5-inch and 3.5-inch drives, besides using an installation without screws. This is because it is a special tower or high-end desktop computer, as in the most affordable towers, the installation is often different.
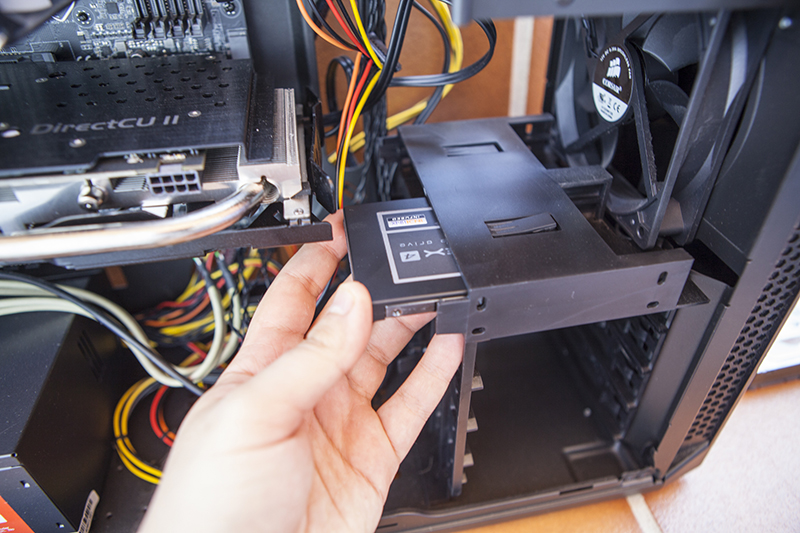
Usually you will find bays in which you have to use screws to secure the drive to them and even use special plates for the 2.5-inch hard drives (SSD) in order to fit neatly into a 3.5-inch bay.
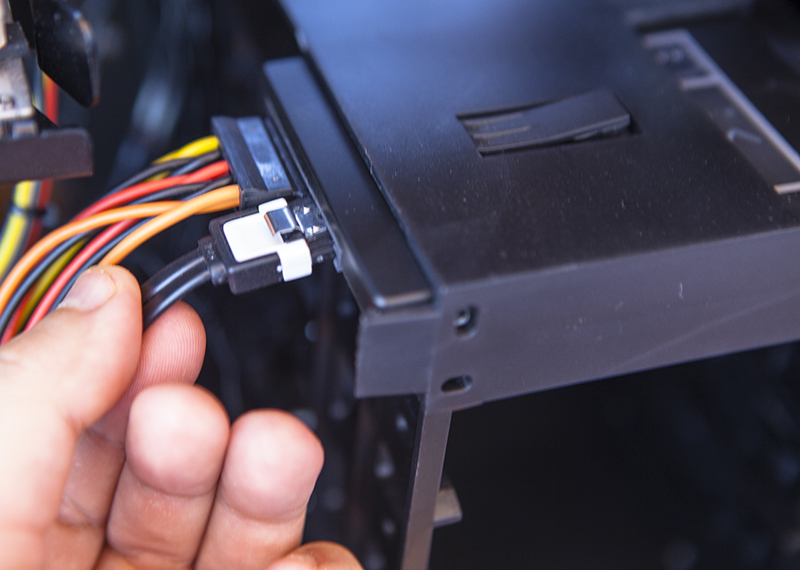
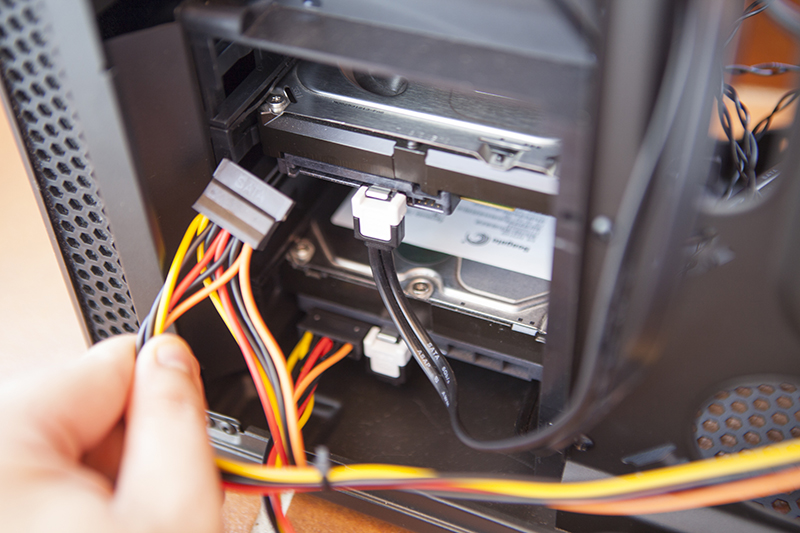
Once the hard disk is set on a free bay, you will have to place two cables; for that you will have to find a free SATA power supply connector in the computer power source (these wires are often black, wide, with a small rectangular notch form) and, of course, you have to connect the SATA data connector, which is the smallest wire, which goes from the hard drive to the motherboard.
If the hard drive that you will install will be the only one in the computer, then you must connect the SATA data cable to the SATA1 connector of the motherboard, and in the event that you want to place extra hard disk storage, you can use the other connectors (SATA 2, SATA 3, etc).
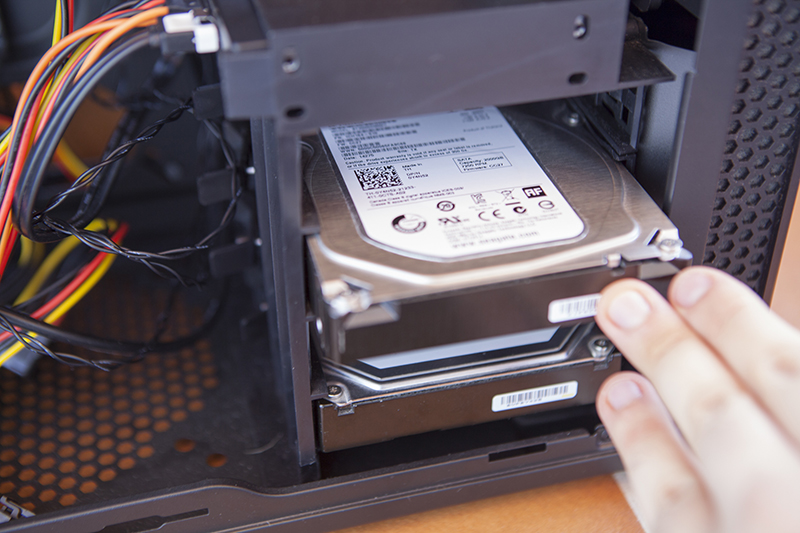
In the computer from the pic we are installing three hard drives, a SSD hard drive as the main drive to install the operating system (for its high-speed data transfer) and two mechanical hard drives as secondary, one of 1 TB and the other of 2TB in size.
If the hard drive to install is a M.2 model, you just have to find the indicated slot for this type of drives on our motherboard and fit it (as if it were a video game cartridge). There are PCI Express and SATA adapters to install M.2 hard drives in other different ports if the board does not have this system.
Installing the hard drive on a laptop
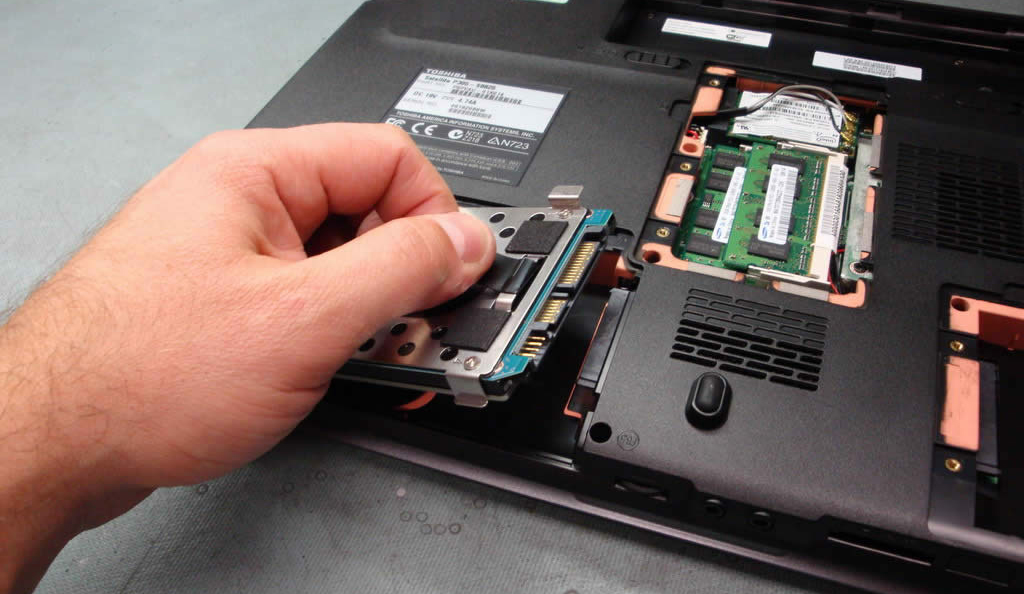
To install a hard drive in a laptop you just have to get hold of a suitable screwdriver to open the case. This time, the process will be much simpler, but you can only install one hard drive instead of several. It is rare to see a laptop with various hard drive bays, unless it is ultra-high end or has the ability to use various types of drives.
After opening the case of the hard drive bay of the notebook (or sometimes the complete case, depending on the model), you just have to fit the drive into the bay or the proper socket and the connectors listed (here you won’t need additional cables), either a hard drive with a SATA connector or a M.2 hard drive.
Following this, you just have to turn on the computer and proceed to install the operating system, if you are starting up with a clean installation, or you can format the hard drive from your usual operating system to a supported format, such as NTFS or exFAT, in the case you use it as a secondary drive to store data.
Read More:
Best SSD for Gaming