Windows 10 is a reality now, and since today, all users will be able to download the new Windows O.S and start making use of it. Although, a lot of people is not too fond of installing an O.S over their current one and rather do a clean installation that guarantees the perfect functioning of everything. In fact, if you’re using Windows 7, this is your best option to install Windows 10, and for that, Microsoft made the ISO’s available on the cloud so that you can download it and create your own bootable disk.
Downloading the Windows 10 ISO Image
The easiest way to do this is to go to the Windows Media Creation Tool download, select the 32 or 64 bit version, download the file and then execute it.
You have two options: if you’re using Windows 7 you can select the “Upgrade this PC now” and start the upgrading process of the PC where you ran the tool. The only thing you’ll have to do is click “Next”.
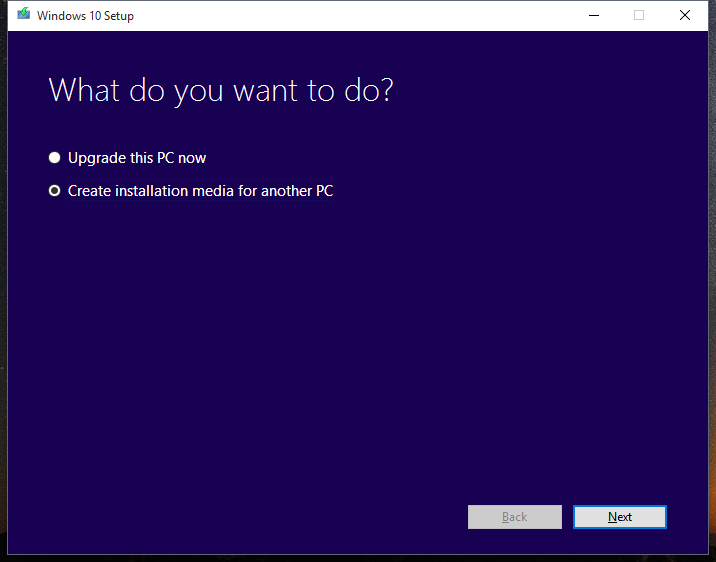
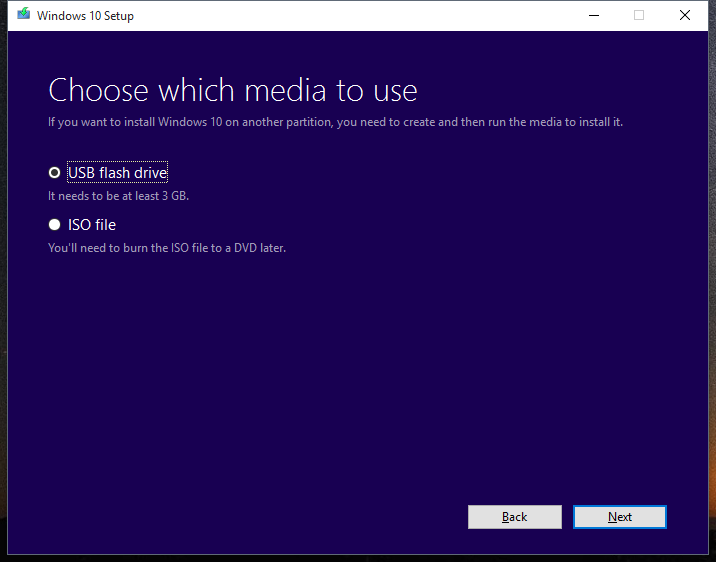
If you want to create a bootable device in order to install Windows 10 on another PC, you also have two options: directly create a bootable USB or DVD disk with the Media Creation Tool, or download the Windows ISO file if you want to create the device afterwards or to use another software tool instead. If you choose the first option, you’ll have to connect the USB to the PC. If you choose the latter one, you’ll just have to download the ISO and select the folder where you want to save it.
Installing Windows 10
On the next windows you’ll have to pick the language for Windows, the version and the processor architecture.
You can follow this table if you want to know your what versión of Windows 10 you can upgrade to:
| Origin edition | Target edition |
| Windows 7 Starter Windows 7 Home Basic Windows 7 Home Premium Windows 8 Standard |
Windows Home |
| Windows 7 Professional Windows 7 Ultimate Windows 8.1 Pro |
Windows 10 Pro |
Remember that you’ll need to have your Windows 7 or 8.1 genuine product key handy to continue with the installation.
At the end choose your flash unit (you’ll need an USB of at least 3GB), or if not, just download the ISO. In case you’re creating the disk, just click Next and wait for the download to finish and then click Finish.
Insert the USB disk on the PC that you want to upgrade (be it Windows 7, 8/8,1), and click on the setup.exe file to begin the installation of Windows 10.
New clean Installation
The previous process is to upgrade to Windows 10 directly from Windows 7 or Windows 8. If what you want to do is to completely format your disk and have a clean installation without any traces of your previous systems, you’ll have to do a couple extra steps.
Instead of clicking setup.exe on your USB’s Windows explorer, restart your computer with the USB connected and access to the BIOS options, change the device’s boot order and place USB drives in the first place of the priority list. Save the changes, restart and run the Windows 10 installation disk.
In some cases you can access to the boot menu without having to change the BIOS options, by just pressing the F2, F12, Del or Esc just before the system boots (screen where the manufacturer’s logo is shown) and a list with the bootable options should appear, included the Windows 10 USB disk we just created.
Once the installation interface is running, you just need to select a couple things, insert your product key, you may format for disk, delete partitions and select where you want to install Windows.
Read More:
Best Antivirus for Windows 10
plz windows 10 activted verstion download