If you would like to upgrade your Windows 7 or Windows 8 to the newest Windows 10 but the previous installation option seemed too complicated, this is for you. This is the easiest and safest way to install Windows. Right from the Windows O.S, using the Windows Update option.
1: Before installing Windows 10
Normally, if you wanted to try any of the Windows versions prior to their official release, you needed to download the ISO file from Microsoft’s website and then create an installation disk in order to install the new Windows onto your PC.
This is now a thing of the past for Microsoft.
Now you can just download the preview version directly to your Windows 7 or Windows 8.1 PC through Windows Update, the manager that comes included in Windows.
This way the update is performed automatically, thus being the simplest and safest method of installation.
However, since nothing in life is certain, before starting the Windows 10 installation, it is convenient to create a security backup of all your files and important documents.
This update will completely replace your current O.S for Windows 10, and even though there’s a way to recover your previous system, there is never the absolutely certainty that the system restoration will work. This is why it is recommended to perform a test installation on a secondary PC or a PC that you won’t need to use right away.
2. Download the Update activator
Before downloading the Windows 10 ISO image, you will need to download and execute a tiny program that will enable the activation of the update.
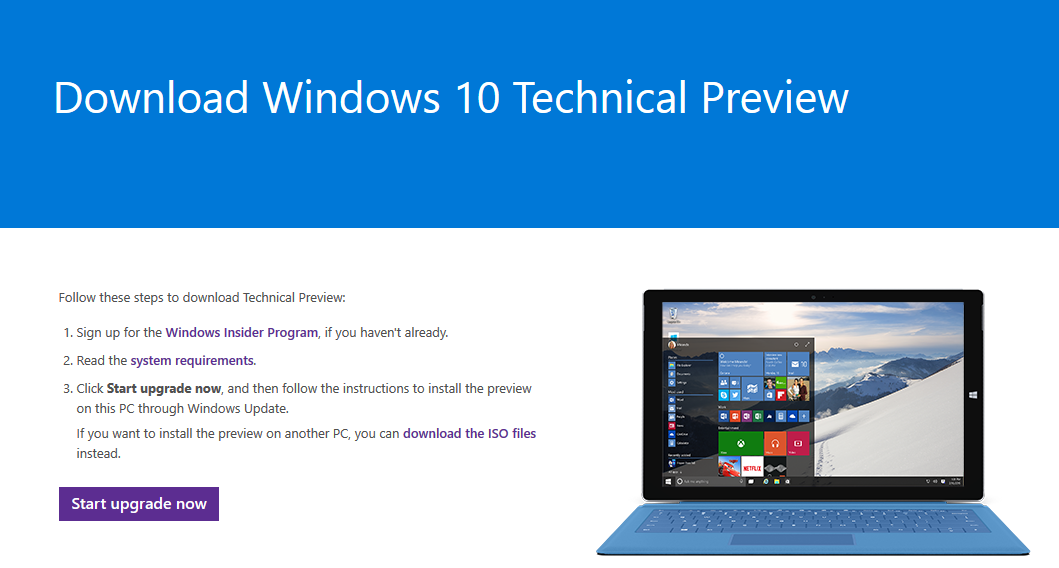
In order to download Windows10TechnicalPreview.exe you will need to go to the Microsoft Official site.

Next, click on the Start Upgrade Now button, and right after that the download will begin. Said program weights less than 12MB.
After the download is complete, right click it and select “Run as Administrator”. Afterwards, the program will be executed and you will need to reboot your computer in order for the changes to be applied.
3. Search for new Windows Updates
After rebooting the PC, go to Windows Update to check if there are still new updates pending installation.
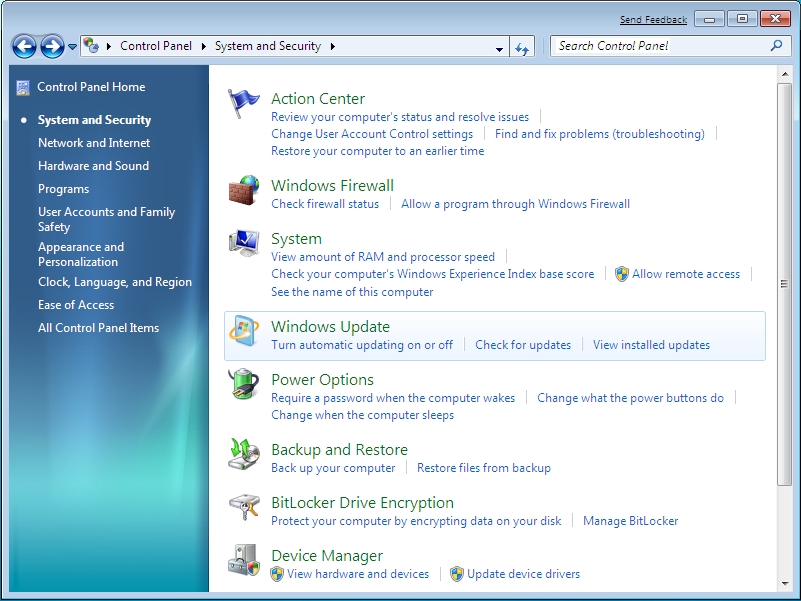
If you are using Windows 7, go to Control Panel and click on System and Security. Next, click on the Windows Update option.

You can also access Windows Update by making a quick search from Start button search box.
If you are using Windows 8 or Windows 8.1, the search will be even easier. Go to the Start screen by pressing the Windows key and just type Windows Update and you’ll see the results right under the search bar. Click on Windows Update and you will be redirected to the configuration windows.
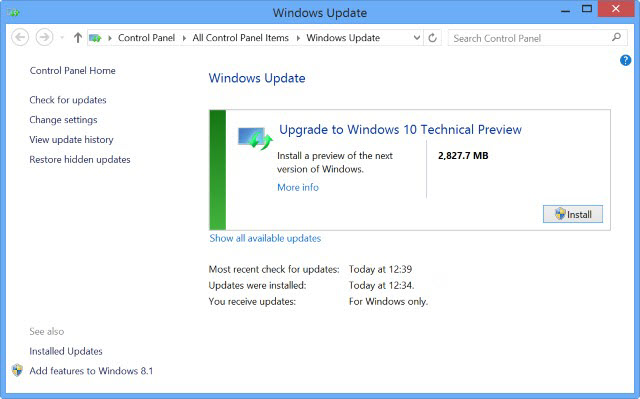
Now click on the Search for Updates button on the left side panel.
After a few seconds you’ll see the new Windows 10 Technical Preview update.

4. Installing Windows 10 on your PC
Once the PC has detected the availability of a new Windows 10 update, click on the Introduction button and Windows Update will begin downloading the necessary files in order to update your PC to Windows 10.
Be patient because Windows Update will need to download a 2.8 GB update.
Once it is done downloading, click on the Verify button so that the installation can begin. Meanwhile, do not close any Windows Update windows.
Next, the installation assistant will begin. Click on Start so that the process can begin and then just accept the terms and conditions.
After this, the assistant will start analyzing your PC in order to check if your PC is compatible with Windows 10 and that it has the minimum space requirements and component compatibility. You will need at least 10 Gb of free space so that the Windows 10 update can be installed.
Once the verification is over, click on the Close button and the installation will continue.
After the download, the installation assistant will begin again.
Click on Start Update Now and your PC will reboot in order to install Windows 10. Do not shut down your PC while the installation is taking place.
Once the installation is over, the PC will restart again and then you’ll be able to start making use of the new Windows 10 version.